When I spotted this beautiful 6" wooden kiss lock frame at a local craft shop, I couldn't resist picking it up. It came with a set of small screws—perfect for securely fastening the layers of fabric sandwiched together.
There’s something so satisfying about thatclickof a wooden kiss lock frame closing around your handmade creation. These retro-inspired pouches are perfect for carrying small essentials—or gifting with flair.
Feel free to download the paper template I used for this bag.
🧵 Materials You’ll Need:
Outer fabric: 2 pieces (10" x 14") – quilting cotton or linen works beautifully
Lining fabric: 2 pieces (10" x 14")
Fusible fleece, foam or batting: 2 pieces (approx. 9.5" x 13.5")
6" wooden kiss lock frame
Coordinating thread
Fabric glue (optional, but helpful for positioning)
Your usual sewing tools: scissors/rotary cutter, pins or clips, iron, sewing machine
✂️TIP: If you're using directional fabric, make sure your pattern faces up from the bottom of the pouch!
Step 1:Cut your outer and lining fabrics using this template.
As my main fabric wasn't directional, I cut it as a one piece, rather than 2, shortening the central part (bottom seam allowance line).
Step 2: Fuse the Fleece
Iron the fusible fleece (or foam) to the wrong side of your outer fabric pieces or simply quilt the batting to the main fabric for more textured look, like I did.
This gives your pouch structure and a soft feel.
Step 3: Sew the Outer & Lining Pieces
Outer Fabric: Place right sides together and sew around the sides and bottom using a 1/2 " seam allowance.
Lining Fabric: Repeat the same processbut leave a 2–3" turning gapat the bottom.
Step 4: Join Outer and Lining
Turn the outer pouch right side out. Keep the lining inside out.
Nest the outer pouch inside the lining—right sides should be facing.
Align and clip top edges and sew around the entire top curve.
Pull the outer pouch through the gap you left in the lining.
Stitch the gap closed with a small ladder stitch or machine-stitch close to the edge.
Push the lining into the pouch and give everything a good press.
Step 5: Attach the Wooden Frame
Slide the top edge of your pouch into the frame evenly.
You can use a small amount of fabric glue to hold it in place.
Use the screws to fix everything together for extra security.
Repeat on the other side.
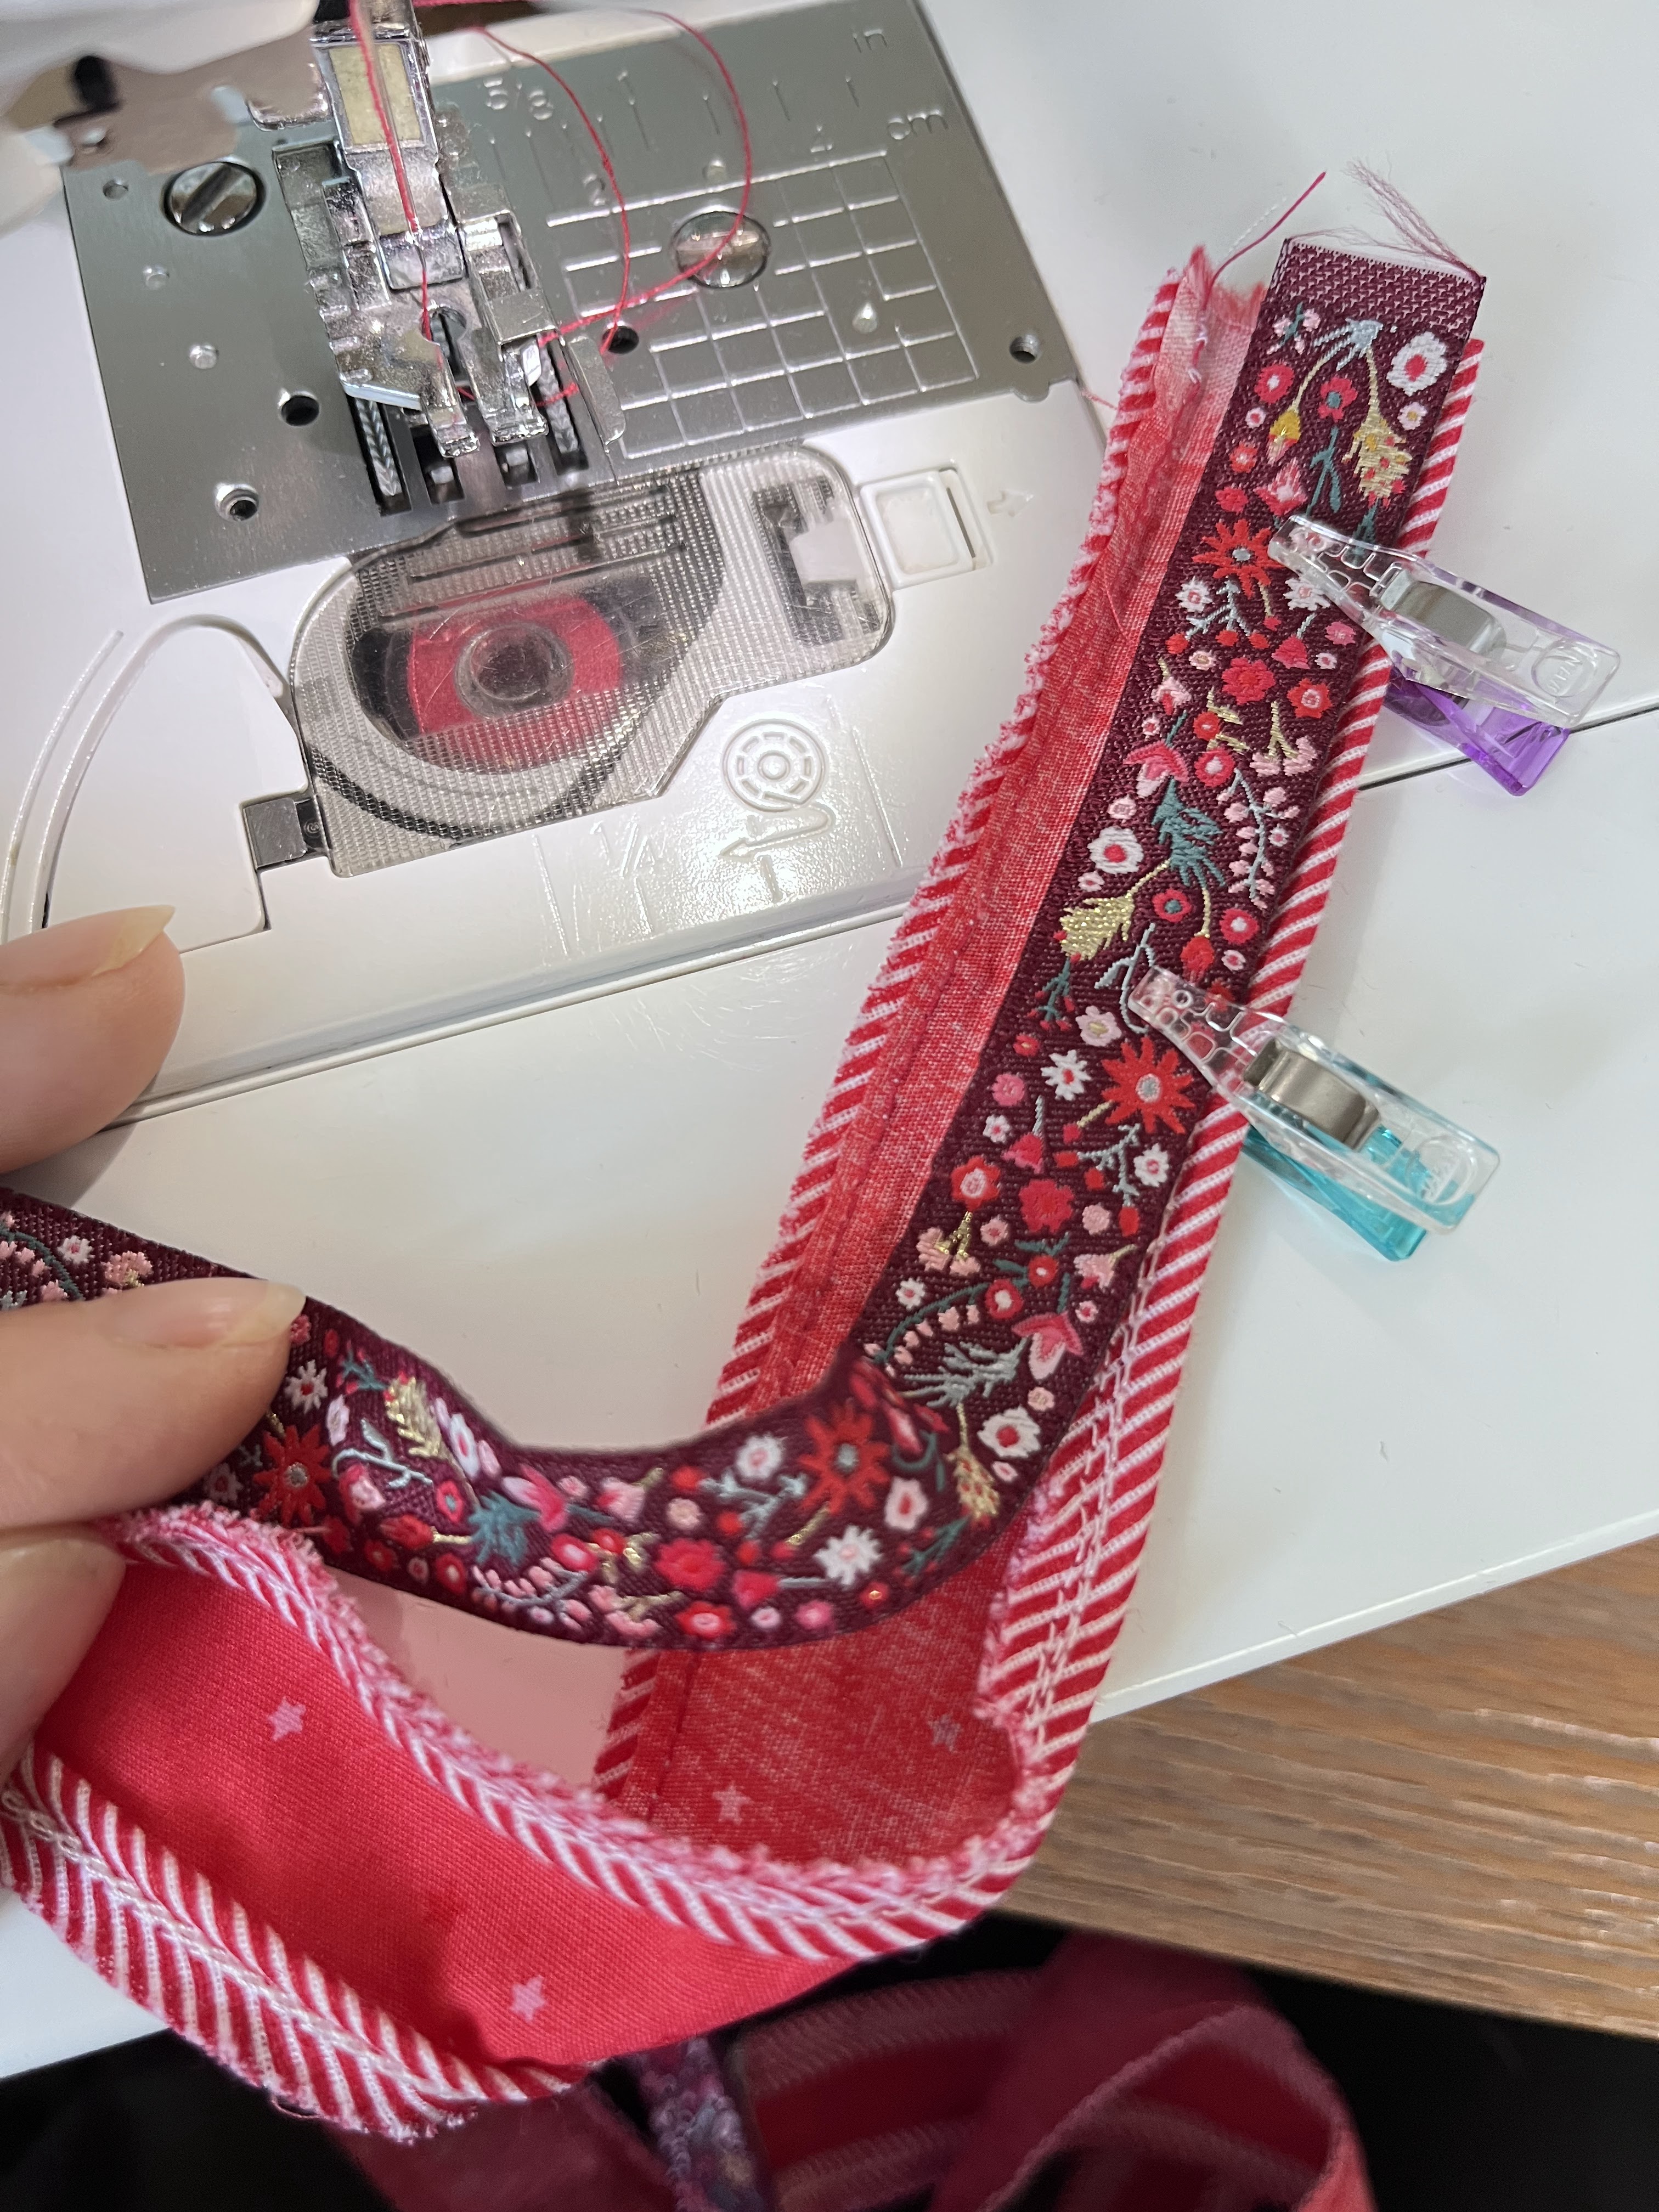
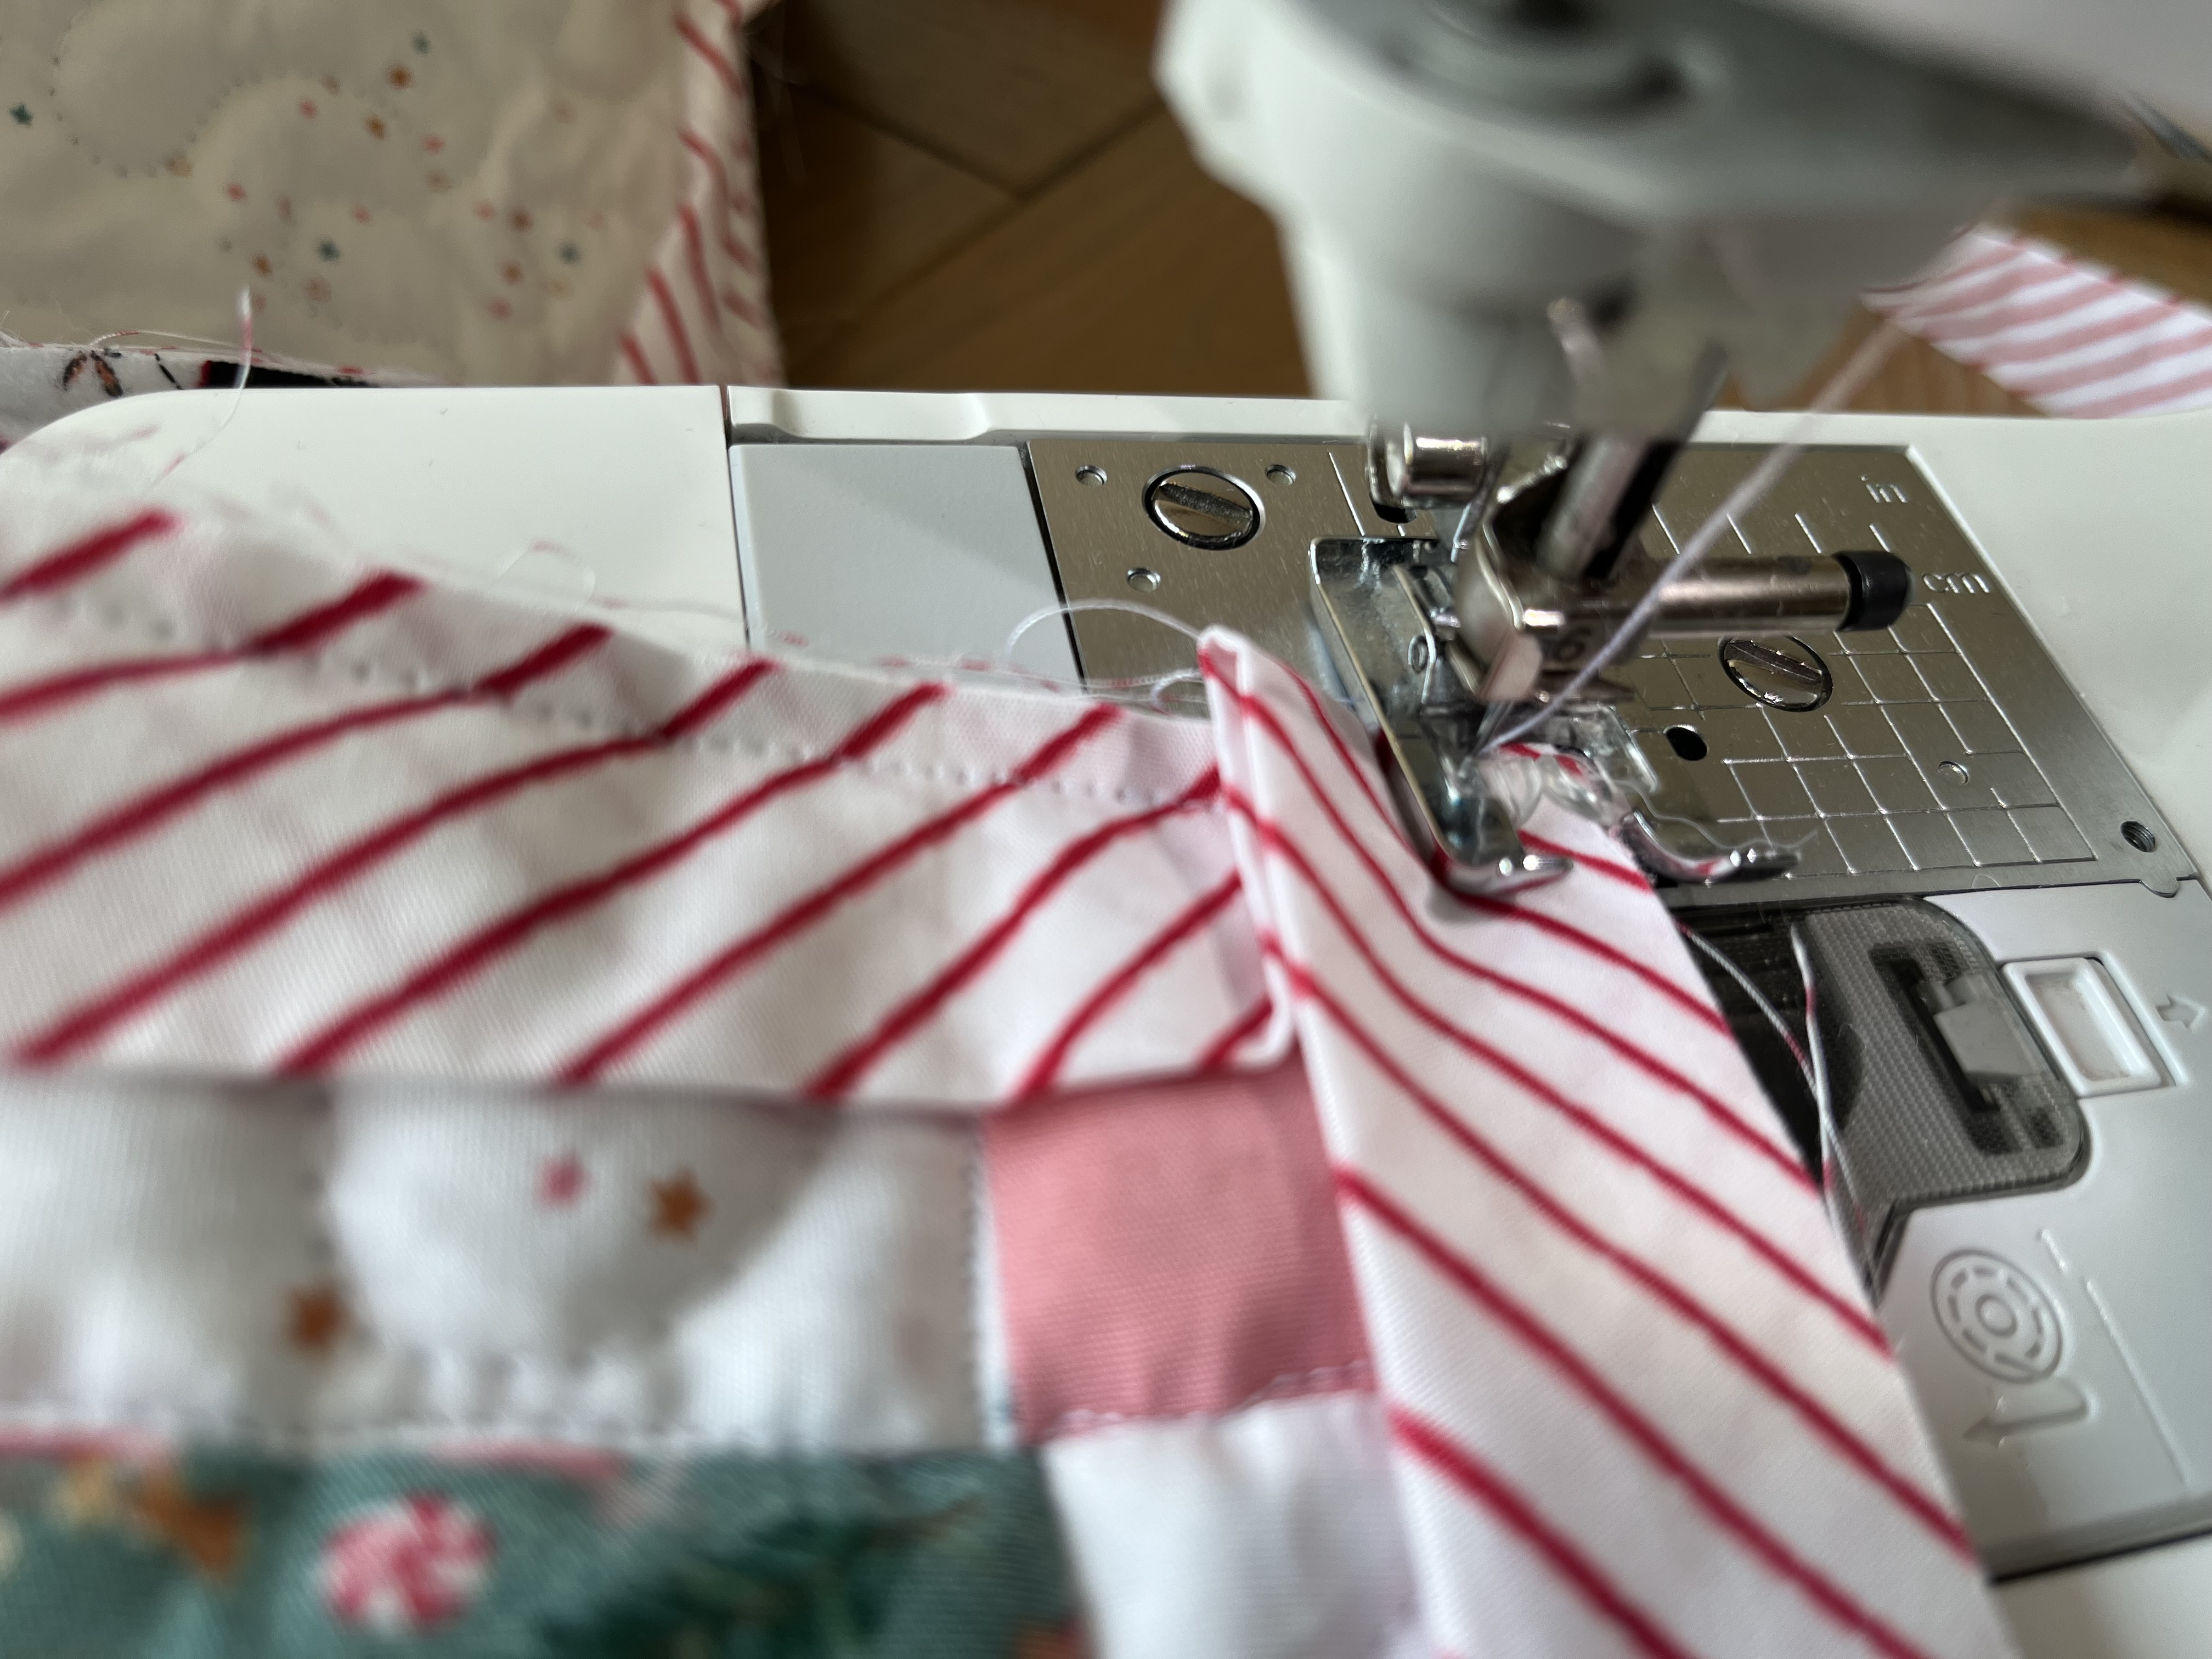
I also stitched up a matching fabric and my Adventale Renaissance ribbon handle, embellished with piping for an extra touch of flair.
I hope that this was helpful! I certainly loved creating mine!!!
If you’ve ever made a zippered boxed pouch and ended up with your cute directional fabric turned sideways (or upside down… oops), this one’s for you!
I’ve updated my go-to pouch tutorial with a smart little fix: free downloadable templatethat helps you easily work with directional prints—no more guessing or flipping pieces around. Whether you're making one for yourself, as a gift, or to use up those irresistible fabric scraps, this version keeps things tidy, professional-looking, and beginner-friendly.
You can watch my video on You tube with a process—from cutting the fabric to sewing the boxed corners—so you can make these pouches with confidence (and style).
The only difference is in size (the non directional one-like this above ditsy floral burgundy one is a bit larger and the main fabric was all one piece and that I didn't cut the corners immediately.
Also, in THIS post you can find more info about embellishing the fabrics and pouch with ribbon details.
🧵 Materials You’ll Need - for the finished size 9" x 5" x 5"
Outer fabric: 2 pieces (10" x 14") – quilting cotton or linen works beautifully
Lining fabric: 2 pieces (10" x 14")
Fabric for the tabs and handle: (3.5" x 12.5") to be cut after sewing in 3 pieces
Fusible fleece, foam or batting: 2 pieces (approx. 9.5" x 13.5")
15" Zipper and pulls (1 or 2 -it's up to you)
Coordinating thread
Your usual sewing tools: scissors/rotary cutter, pins or clips, iron, sewing machine
✂️TIP: If you're using directional fabric, make sure your pattern faces up from the bottom of the pouch!
As Adventale fabric collection has a lot of cute panels that can be very inspiring and unique for gift-giving projects and has that Alphabet panel that can be such a beautiful way to turn initials into stitched art.
*discard the numbers on this first paper template-that was a first test, so it's not perfect and was improved
I started with cutting the letters M and R in 7.5" squares. I added 7.5" x 3.5" rectangles in Twinkle Little Stars Sky fabric on both sides and sew them together.
Then I added 1.5" x 14" rectangles in Jolly Ribbons Festive fabric at the top, where the zipper will be sewn to both rectangles and there should be added another 2" x 14" rectangles of another fabric for the bottom ( I added that small ditsy floral from my Plentiful collection).
Here are quilted and sewn together both sides. My lining is Twinkle Little Stars in Ruby.
I also did the other pouch but all in one fabric, using another fun letter print from the collection called Letters to Santa.
Instructions:
I like to use plastic zippers sold by the meter. They are affordable, available in many colors and they are easy to sew over, without the fear that the sewing needle might broke. While the easiest way to use them is to simply detach the sides and install the zipper pulls (sliders) only after sewing the zipper to both main fabric panel and lining, I filmed also the version with the zipper pulls on from the beginning, so I hope that this overlapping of two zipper methods will not be confusing.
Prepare the Fabric:
Cut the outer layer fabric, batting and lining fabric according to the specified dimensions. Cut the rectangle that will be used for the handle and tabs.
Ensure that all pieces are neatly cut to size. Quilt the main fabric to the batting as desired-this is to stabilize the fabric and give more structure to the bag. You can avoid this step by using some thicker fabric, like canvas or similar.
Clip the fabrics and zipper tape to mark the centers for easier matching.
Make the Handle and Tabs:
Take the 12.5” x 3.5” (32 cm x 9 cm) rectangle.
Fold the rectangle in half lengthwise and press along the fold to create a center crease.
Open up the fold and press both longer sides towards the center crease.
Fold the rectangle closed again along the original center crease.
Topstitch along both longer edges of the rectangle to secure the folds in place.
From this rectangle, cut the handle at 6.5” and the remaining 6” divide in half to obtain two 3” pieces that will be folded in half to become tabs.
Attach the Zipper:
-I have filmed 2 videos: one is showing the zipper with the pulls already on (in case that you are applying the regular, ready to sew zipper) while the other clip in the video is showing the easiest way to attach the plastic zipper and add the zipper pulls (sliders) by yourself. If you wish to add pulls on both ends of the zipper, take care to insert them in opposite directions—from the ends toward the center. Be mindful to avoid any weird bubbles forming, which can depend on how the zipper teeth are picked up in installation.
Place one outer layer piece face up.
Position the zipper face down along the top edge of the fabric.
Align one lining piece face down on top of the zipper.
Stitch along the edge to attach the zipper.
Repeat the process with the remaining outer layer and lining pieces on the other side of the zipper. Ensure that the sides are neatly overlapping and flat, then press them down. Proceed to top stitch along both sides of the zipper edge to secure them in place.
Create the Pouch Body:
Open the zipper halfway to facilitate turning the pouch right side out later.
I suggest to add the zipper tabs right now in the beginning, as it will also secure the sliders and prevent unzipping.
Trim off the excess of the zipper tape at this point.
Turn the pouch right sides inside and stitch the bottom edge of the lining layer, leaving a larger opening for turning. Finger or iron press this seam open, for easier stitching.
Fold the fabric pieces so that the outer layer pieces are right sides together, and the lining pieces are right sides together.
Finding your centers (clipped or marked at the beginning), align your bottom edges right sides inside so that they are overlapping the zipper that will be in the middle, make sure that the tabs are in, the zipper is in the center and that everything is even. Clip or pin together both sides.
Box the Corners:
Press your bag nicely, making sure that everything is aligned.
Stitch both sandwich edges (with zipper in the middle) closed.
You can add the handle on one side of the bag by finding the center of your seams, securing the handle with the clip and sewing over. You can either sew it to just one side by securing it or you can clip it together with all two layers that will make the boxed corner and sew over. Making sure that the handle is going straight, you need to bring it to the other side and repeat the same process of aligning it to the center of your seam, securing and stitching it in place.
Finish the Pouch:
Turn the pouch right side out through the opening in the lining.
Push out the corners to ensure they are fully formed. Check that everything is nice and even and that there aren’t some holes or missed seams.
Stitch the opening in lining closed using a slip stitch or topstitch.
Press the pouch to remove any wrinkles and ensure a smooth finish.
Your boxed cosmetic fabric pouch is now ready to use or gift!
I hope that this was helpful, but I am sure that watching the video will make the process even easier.
I can't wait to find time to make another video in horizontal format! Hopefully soon.
We are using the hashtag#winterflakequiltSAL on the social media for all the pictures during this quilt-along.
This week it's all about the quilt assembly and with these large blocks, it will go very fast!
While my throw size was so easy to assemble, there are baby and bed size of the pattern that are assembled on the diagonal or "on-point" layout, so I explained a few possible troubleshooting issues in the video.
My quilt pattern testers mainly chose to create this small size and you can check out their versions HERE.
There's only one last week left where I will share with you my process of finishing the quilt.
We are using the hashtag#winterflakequiltSAL on the social media for all the pictures during this quilt-along.
This week we are here to finally start assembling the blocks and you can also find all the needed informations with diagrams on the page 9 in the pattern.
You will see how surprisingly easy it will be, now that we have all the quarters and inner borders assembled and have cut all the big, 12.5" squares and rectangles in fabric A.
I hope that you enjoyed this episode and that you have found something useful in my videos!
Hello and welcome to the 3rd week of our Winterflake quilt sew-along and thank you so much to everyone who participated in the Fabric + pattern giveaway!
As we assembled strips sets and have cut the strip units last week: this week, we are talking about quarter blocks making, which are needed to assemble the snowflake, I mean Winterflake blocks 1 and 2.
Here are the previous posts if you are catching up only now:
We are using the hashtag#winterflakequiltSAL for all the pictures during this quilt-along.
This week we are here to finally start assembling the blocks, I mean block’s quarters, that you can also find on the pages 6, 7 and 8 in the pattern.
You will see how surprisingly easy it will be, now that we have all the units cut and strip units assembled.
The basic, log cabin structure of quarters of quilt blocks 1 and 2 is a centre shape surrounded by strips, or “logs”. Use the table on the page 6 to create the requirednumber of blocks andinner border units for your quilt size.
Using the diagrams provided in the pattern and paying close attention to the orientation of the Strip Set units, pin and sew logs.
We are starting with the simple 3.5” square in fabric C for the quarter 1, while
for the quarter 2, we are starting with the 3.5” square in fabric H.
We are making the quarter 1 in the video.
As you can see, the most important thing with sewing these log cabin structured blocks is to keep precise ¼” seam allowance, as with basically every quilt block.
I am sure that from this you can easily obtain all the blocks and assembly your quilt top too, but we will leave that for the next week.
I hope that you enjoyed this shorter episode and that you found something useful in my videos!
Happy 4th of July to all of you celebrating and see you next week!
Also, If you have your fabrics chosen already, please use the hashtag#winterflakequiltSALso that I can see your pictures and also use this hashtag for all the pictures during this sew-along so that they are visible for all the participants. This giveaway is open till Friday, June 30 and is open worldwide!
By using this hashtag and posting your picture, you become eligible to enter the giveaway on Instagram and hopefully win the prize that includes:
Here is the Winterflake quilt pattern SAL schedule with pages covered from the pattern:
Week One, June 19 - Prep: Choose + Cut Fabrics: page 1 and 2
Week Two, June 26 - Make strip sets: page 3, 4 and 5
Week Three, July 3 - Make Quarters : page 6, 7 and 8
Week Four, July 10 - Make Blocks: page 9
Week Five, July 17 - Quilt top assembly: page 10, 11 and 12
Week Six, July 24 - Finishing: page 14 and 15
Based on some questions I got I will quickly go through some basics of the prepping process again, just to be sure that I covered everything, even because I am so happy to be welcoming some beginner quilters aboard!
Preparing the fabrics to cut:
You got your fabrics and you are torn between prewashing or not?
There are different opinions about that and that’s where fabric quality also plays a big role, because obviously not all the fabrics will shrink the same way. But if you are using the fabrics from one manufacturer and they are all the same substrate, like in my case with all AGF fabrics that are all 100% premium cotton weight-I will not prewash them. If I would choose to use maybe the linen as a background fabric (which can be pretty amazing) which is 55% linen and 45% cotton and is a different fabric weight as well, I would definitely prewash it.
Fabrics are commonly woven and that involves the interlacing of two sets of yarns or threads at right angles to create a stable and cohesive fabric structure.
In the weaving process,the longitudinal threads are called warp threads while the horizontal threads are called weft threads are then woven over and under the warp threads to create the fabric. Not all the fabrics are woven the same way. Some of them are woven loosely and they don’t have the same thread count. So, if the fabric weaving is just not tight enough, it will definitely contribute to eventual bowing. That’s why most of the quilters suggest using the narrower stitch length while piecing, in order to straighten the fabrics additionally. In my case, as I am the AGF designer and I am lucky enough to be using only the AGF fabrics that are well known for their high thread count, I know that my fabrics will not be giving me these kinds of problems, unless my piecing is not perfect.
I would strongly suggest to nicely press fabrics before piecing and cutting (even though I must confess that I am not always doing that myself, if the fabric is not really wrinkled and creased).
I am using a steam while pressing my fabrics, while when there’s some piecing involved like with strip pieced sets, units and blocks, I don’t use the steam.
When pressing fabrics, I suggest to open them nicely and press from one selvage to another, releasing all the wrinkles and creases. I like to lay the next fabric on the top of the first one and I tend to make a nice batch like that with the fabrics that will be used for that particular strip set (usually 2-5 fabrics).
Once the fabrics are cooled down from pressing, I like to fold them and line up the selvages together.
Before pressing and cutting, please check your edges and make sure that you are cutting the fabric on grain.
Some tips for sewing the fabrics together accurately:
- clean your sewing machine, especially the feed dogs
- adjust your stitch length to 2 mm
- use the scant 1/4" seam allowance
- use the ¼” seam allowance presser foot
- use the magnetic seam guide
Sewing the strip sets:
In this quilt pattern, we are using the strip piecing techniquethat involves sewing together fabric strips to create fabric sets, which will be used to obtain some units.
In order to avoid any accidental bowing and fabric deformations, I intentionally put the length of my strip sets in this pattern to be 21” rather than 42”. First because there are people that will be using Fat Quarters and then because I think that it makes everything just easier and more precise. Especially for the baby and throw size. While maybe for the bed size, you would prefer using entire width of the fabric strips. But that’s up to you.
So let’s get started!
Take the first two strips from your prepared fabrics and place them right sides together. Align the edges and sew them together along one side using a quarter-inch seam allowance (I strongly suggest using scant seam allowance, like I said and shown in the video).
Making sure that fabric stays lined up, just sew with medium velocity, which would help controlling the piecing precision.
Off the sewing machine, press the seams either open or to one side (usually toward the darker fabric).I prefer having my seams open and I always use my fingers to press and set the seams, before using the iron.
Continue adding strips to the sewn unit, one at a time, in the order determined by the pattern. What may help here is also changing the directions of sewing the strips together, from up down and vice versal. Sew each strip to the previous one, aligning the edges. Press the seams open or to one side after each addition.
Once you have your strips sets all sewn and pressed, it’s time to make the units. Following the diagrams in the pattern, make the number of cuts from each set needed for the quilt size that you are making- just follow the table on the page 3 that determines the exact number of strip sets and strip units-subcuts.
When making the first cut, try to follow the grain and make a nice, crisp and straight edge, which will also serve as a guide. From that you can easily cut any needed strip sizes. But hopefully you watched my first video and saw that part already.
Let's see for example this strip set # 1. I am making the first cut by trimming off the edge. I am making attention to the middle seams and edges in the sets being parallel to the lines on my ruler and I am making the first cut at 3.5”, cutting the squares out from this first strip set. Following the table on the page 3, I will see exactly how many units I need to cut from each of the strip sets. In my throw sized version, I will need 16 units cut from both SS1: AD and AI.
So following the instructions and diagrams for all the strip sets, we will have strip sets 1, 2, 3, 4 and 5 done.
While cutting fabrics, you need to strongly press your ruler to avoid eventual shifting and moving, or try following the cutting path with your hand so that-portion, by portion, it would get nicely cut without ruler moving, which would result in getting wonky and uneven strips.
Try to use the guidelines from your ruler to obtain precise cuts, especially when cutting small, narrow strips and units.
After obtaining all your strip units, you are ready to make the block's quarters!
Hi! I'm proud mama of 3 gorgeous kids that are true inspiration for my work. I love to create and express myself through many forms of art: collages, drawings, illustrations, calligraphy, graphic design, textile and surface design, printing, photography, sewing.....


.jpg)


%20(1).jpg)


 GRID
GRID
 DECADENCE


