. . . . . . . . . . . . . . . . . . . . . . . . . . . . . . . . . . . . . . . . . . . . . . . . . . . . . . . . . . . . . . . . . . . . . . . . . . . . . . . . . . . . . . . . . . . . . . . . . . . . . . . . . . . . . . . . . . . . . . . . . .
Showing posts with label christmas. Show all posts

Monday, 5 June 2023

WINTERTALE is here with quick fabric postcard tutorial


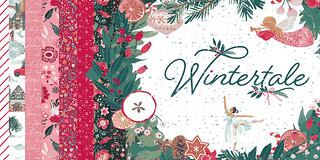
My newest fabric collection, Wintertale for Art Gallery Fabrics is here and I am busy planning, cutting and creating with these fun new prints.


This is my first ever Christmas fabric collection and it feels a little bit extra special because of that reason. 
I created almost all of the artwork in watercolour technique and I couldn't be happier about all the little details, textures and colours that Mill have so successfully translated onto screens to use for printing. 


I wanted this collection to have a bit of vintage-y and nostalgic vibe, but yet to feel very modern and inspirational for a wide array of crafts and Xmas projects in general. There are so many ideas and possibilities to create and celebrate the most wonderful-festive time of the year.

The most "obvious"idea giver is this Holiday Spirit, 24" wide panel that carries so many fun motifs, scenes and illustrations that could be cut and used for different kinds of projects-from tags, cards, pillows and many types of fabric embellishments even for some scrapbooking or maybe some decorative stitching? I can't wait to see all the ideas and uses.


I posted on my Instagram feed this very quick and easy Christmas card making, but thought to post it even here, for easier linking.

Fabric Christmas card tutorial

• So basically you just need to choose and cut 2 rectangles with your favourite illustrations from the panel (taking care about what will be the front and the back of the postcard).


 Optionally, fuse the stabiliser on one of the back sides of the rectangles for more sturdiness.


 Sew the rectangles together with right sides inside, leaving the 2-3" gap opening for turning it out. 


 Clip the corners (close to, but NOT through, the stitches) to reduce bulk and obtain neat corners.


 Turn the postcard to the right side (use the point turner tool or something similar to nicely push and form the corners) and top stitch all the way around, securely sewing the opening close.


You can write, embroider or stitch a nice message prior to assembling the postcards that will give them a special and unique look.
I hope that you will have fun with these fabrics and that you will share your projects with me!
xx
Katarina


Thursday, 17 December 2020

Easy fabric Xmas ornaments in Aquarelle


Xmas is just around the corner and I am so happy that I had new fabrics to play with. 
It's my Aquarelle collection for Art Gallery fabrics.:)


I will dedicate the next post to better introduction and presentation of the collection, but I had to show off these freshly made fabric ornaments, that were so easy and fun to make! 
Actually I am so happy that this year we decided to buy a small natural tree that we can't wait to plant in the garden, just after the Holidays.


Regarding the ornaments, I browsed the internet to find some ideas and here are the links to some great ideas:
👉 no sew Xmas scrap trees
instead of the cinnamon sticks, I used some vintage wooden spools that were perfect for wrapping few fabric strips (just folded in half lengthwise) and holding the ribbon tied into a knot at the bottom


Hope you are trying to bring some joy into this Xmas period, which is not very easy with current pandemic, but let's stay well (positive would sound totally inappropriate) and safe!!!
Happy Holidays and happy sewing!
xx
Katarina

Sunday, 4 December 2016

Christmas stocking tutorial / pattern


Christmas stockings in different fabrics and even sizes can be fantastic as part of Christmas décor, are great for gift giving and are very easy to make. You can play with different fabric placements, using even some quilt leftovers, making unique and fun pieces. You can adorn and customize them by adding buttons, ribbons, trims, beads, doing maybe some hand or machine embroidery details.

The featured fabrics are from my Blithe fabric collection for Art Gallery Fabrics.


To download the stocking template and pattern, please go HERE

Finished size of the stocking is: 19" tall and 12" wide.

You will have to tape 4 pages to obtain the stocking pattern in real size that, after taping, will look like this:

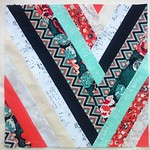
I had so much fun making this striped patchwork piece in Blithe fabrics! You will need 13 strips of fabrics cut in 2 x 28" size to have enough for cutting 2 shapes, that will be front and back piece of the stocking. Or you can just use plain fabrics, to obtain simpler look.


Materials
For 1 stocking

Paper template (provided)
Main fabric - two 21 x 14” pieces (or 2 fat quarters) or ½ yd of fabric if using one same print and horizontal layout (if the print is directional, you will need 5/8 yard to use the right direction of the print)
If you are making the strip pieced patchwork (like pictured), you will need 13 (thirteen) 2” x 28”strips of different fabrics
Cuff - 18” x 6” fabric strip on fold
Lining - two 21 x 14” pieces (or 2 fat quarters) or ½ yd of fabric if using one same print
Trim or ribbon for hanging (you can even make your own with fabric leftover), 7”
Medium weight, one-sided fusible interfacing or batting* (optional) in same size as other pieces
Cutting mat
Scissors
Iron
Needle and thread
Sewing machine
Pins
Fabric pencil or marker


Directions

1. Using the provided stocking template , cut four same fabric pieces (two for front-back and two for lining).

*Optionally, using the same provided template, cut two interfacing-stabilizer or batting pieces and iron or sew them to main fabrics: front and back pieces.

2. Pin and sew front to back pieces, right sides together on marked line (stop sewing approx. 5” from the end). Be sure to notch ( make small V shapes) the curves in order to obtain nice shape and prevent scrunching.

3. Pin and sew the lining pieces together (stop sewing approx. 10” from the end). Be sure to notch ( make small V shapes) the curves in order to obtain nice shape and prevent scrunching.

4. Make the cuff: take the 18 x 6” strip, fold it on the longer edge, right side inside and sew the shorter edges. Turn the cuff to the right side and press it nicely.
 *Optionally, you can embroider this cuff for a nice, customized look.

5. Pin and sew the cuff to the main fabric pieces, on the upper stocking edge, making sure to offset it from both vertical edges.


 6. Make a loop with the trim or ribbon and sew it to the unsewn corner of the stocking.

7. Place main fabric pieces on the top of the lining fabric pieces (or vice versa), right sides inside, pin and sew them together on the upper, straight edge.

8. Right sides inside, pin and sew the remaining edge close, starting from the main pieces, leaving the 3” gap open on the lining part of the stocking, that will allow turning the stocking inside out.


9. Turn the stocking inside out and sew the gap closed. Put the lining part inside and press nicely.


10. Optionally, top stitch the upper right edge of the stocking, all over, to secure that the lining stays evenly inside.


Happy sewing and happy Holidays!!!
Katarina

Wednesday, 25 December 2013

Happy Holidays! :)


Happy Holidays

I wish you a wonderful and peaceful Christmas and very Happy, joyous and creative New Year!!
xo,
Katarina

Monday, 24 December 2012

Merry Xmas and Happy New Year!!!

May all your dreams come true. May love work its magic into your life. May your heart be filled with hope and joy. May you touch every life you meet. 

Merry Christmas and a prosperous New Year!!!!!

Thursday, 6 December 2012

Holiday Xmas tags - freebie!!!


Xmas fabric ornaments

Xmas is just behind the corner, so I started creating some first gifts. I am so happy to be able to have my own fabric designs printed through Spoonflower, and it makes so much easier to create some things with the designs in forms of fabric templates. You can find them mainly HERE and HERE. 

Xmas napkins, set of 6

We are having the fun contest @ Spoonflower this week. It's a contest for the gift tags that can be printed on fabric (or wall decal or wallpaper material), then cut out and used by anyone. I started designing them, firstly based on my animal laser cut cardboard tags , but then I started playing with some mustaches, frames, letters and shapes and I just couldn't decide which ones to use, so I used all!!!So there are 24 different tags, a bit of something for small and bigger kids!!


Here is my contest entry but now you can even download 4 different tags (total of 12 tags when printed on the A4 paper sheet) as paper template.
Simply, just download it HERE, cut them end use them!:)
Please just play fair, as these are FOR PERSONAL USE ONLY. So, PLEASE DO NOT COPY, DISTRIBUTE, SELL, OR CLAIM THEM AS YOUR OWN.


Hope you will love and use them!
Happy prepping x Holidays!!!
Katarina,xx

Monday, 19 December 2011

Merry Christmas and Happy New Year!!!

First of all, I wanted to THANK you all for participating in my Giveaway organized by Sew mama sew. I wish I could send something to each of you, but you can see the names of 4 lucky ones, chosen by Random, in my previous post. The parcels are already on theirs way to the winners, so I am all set;) I've enjoyed reading your comments and I will certainly do this again, I think that the next one is in May.

december ties

december ties

funky ties

funky ties

funky ties

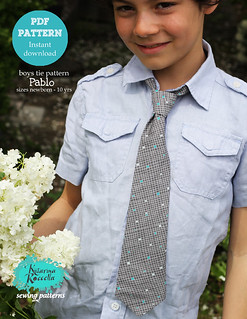
I think that the boys ties were the most wanted item and I think that many of you will love my upcoming tutorial for them:) I hope it can be a present from me to you as well:)
I made so many ties last week and the SHOP is loaded.
For the girls, I made many hair clips and other Xmasy items and now I can think about packing, as we are going to Italy to spend the Holidays with my husband's family.

clips

So, I wish you all a wonderful Christmas and the best 2012. year to come!!!:)
Merry★* 。 • ˚ ˚ ˛ ˚ ˛ •
•。★Christmas★ 。* 。
° 。 ° ˛˚˛ * _Π____*。*˚
˚ ˛ •˛•˚ */______/~\。˚ ˚ ˛
˚ ˛ •˛• ˚ | 田田 |門| ˚And a Happy New Year!

Katarina

Saturday, 3 December 2011

Xmasy

rabbit ornament

A little bit over 20 days left till Xmas. I like this period, thinking about decorating and enjoying decorations and ornaments.

xmasy trees
ornaments xmas ornament

xmas ornaments

I love thinking about gift giving and all what goes with it...presents, wrapping, bows, cards etc...

baby reversible apron dress back baby reversible apron dress front

small snowflakes

Each year I think about making downloadable illustrations x tags, cards etc., but time is never enough for everything. Well, next year, hopefully. But I just love these little kraft tags I made last year

craft tags

They can be found in my etsy shop and in Alere Modern shop.

Also, I will be participating in Sew, mama sew big Giveaway on December 12, so be prepared and if you have any ideas or wishes, please let me know;)) I am still undecided and unsure about what to Give away.


xo, Katarina