. . . . . . . . . . . . . . . . . . . . . . . . . . . . . . . . . . . . . . . . . . . . . . . . . . . . . . . . . . . . . . . . . . . . . . . . . . . . . . . . . . . . . . . . . . . . . . . . . . . . . . . . . . . . . . . . . . . . . . . . . .
Showing posts with label tutorial. Show all posts

Wednesday, 4 March 2026

Patchwork, But Make It Fashion: A Quilted Zipper Hoodie


It’s hard to believe it’s been four years since I made that Botanist patchwork hoodie for my son — and, well, it’s definitely running a bit small now! I couldn’t wait to make a new one with fabrics that felt more him — and with the Soar fabric collection, here it is!

He even helped me while I was sewing, which made the process magical… until the moment of truth: assembling everything and realizing it’s a bit tight in the upper arms. Argghhh — I should have measured him before cutting!

The good news? The pattern is the same Burda/Simplicity Man Hoodie 6718, but I added a zipper. That meant I made the front as one piece, then split it in two to insert the zipper — as shown in this convenient video. Honestly, without that zipper, getting it on him would’ve required both strategy and negotiation. 

But on the positive side — I will wear it with pleasure, so I officially have a new statement piece in my wardrobe!! Cozy, colorful, quilted, and with a zipper — what’s not to love?

So, lets start with the process!

I started with cutting the fleece as a base, but using batting or flannel is perfect too (you could even recycle an old thinner blanket for this — it adds beautiful loft and sustainability to the project). This base acts as both your stabilizer and your quilting layer, so there’s no separate quilting step at the end.

image courtesy of Art Gallery Fabrics

It’s always so satisfying turning simple strips into dynamic patchwork panels. Of course, there's a handy strip roll with already pre-cut 2.5" strips, so it's perfect for this project!

I started by cutting all my Soar fabrics (all 16 prints) and some new and old Seedling prints into 2.5" x 21" strips. 

From older Seedling colors, I used Licorice, Sage, Shitake, Copper, Clay and Pewter. So 16 Soar prints and 10 total of Seedling colors (4 new + 6 old colors). 

I have cut 2 (two)- WOF (2.5" x 42") strips from each of these these 26 fabrics and then subcut all the strips in half for easier strip-sets making. 

It's like 130" x 42" total of fabrics used for the patchwork. I had some leftovers, though...

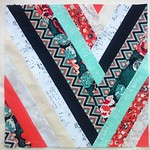
From there, I created strip sets of varying widths, from 3 to 8 strips per set. The process is straightforward, but a few little tips make all the difference: change your sewing direction as you stitch the strips together. This helps prevent bowing or curving of the strip sets, keeping everything nice and straight. After stitching each set, I pressed the seams — careful open seams pressing is key for smooth, flat sets.

Once pressed, it was time for my secret weapon: the Stripology squared ruler. Using this handy tool, I cut the strip sets into new, perfectly even patchwork strips — ready to assemble into the larger design.

This technique is perfect for creating structured, versatile patchwork, and it’s especially fun when mixing fabrics of different colors, textures, or patterns. Every set feels like a mini quilt in itself, and the possibilities are endless!


Instead of sewing patchwork blocks first and quilting later, each fabric strip is added directly onto the batting base. I began from the bottom — placing the first strip right side up and stitching it down with a simple straight stitch at the bottom.

From there, I added the next strip right sides together, just like traditional patchwork. After stitching the seam, I flip the new piece open and press it flat. Because it’s attached to the batting underneath, it’s already quilted in place.

Piece by piece, adding strips in rows, going up, trying to maintain good alignment, until you reach the upper edge of the base.


Beside fabrics for the patchwork strips and flannel or fleece for the base or lining, (calculate at least 2-3 yds  for the patchwork and the same for the base) you will need around 1.5-2 yds of the trimming for wrist cuffs and waistline or some kind of jersey fabric that can be cut in strip, folded and used as ribbing. And a zipper. I used the 60 cm one.


You can also add the eyelets and a cord within the hoodie part- as the pattern provides. I didn't, as I lined the hoodie part with the Seedling Forest print. 


The first thing I did was the smallest - the front pocket. 


Here are all the hoodie pieces before adding the zipper and final assembling.


Again, you can watch this convenient video for adding the zipper.

I made a following video while sewing my first hoodie, it could be helpful to watch. 

The patchwork method is the same, only that this time I used only 2.5" strips while in the first video/hoodie, I used different strip widths. 

I really hope that you may find this inspiring and I really think that this is amazing way to use some loved fabric scraps and quilt blocks and leftovers! And I think that it's easier than making a jacket or coat, so maybe worth trying before sewing something a bit more delicate.


Happy sewing, Katarina


Friday, 31 October 2025

Barcelona tote bag tutorial


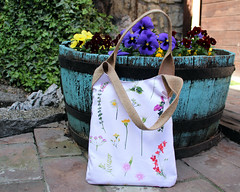
Tote bags are such fun, quick projects that combine practicality with creativity. This time, with my Barcelona fabrics, I wanted to make a larger version (14" x 20"- 35 × 50 cm finished size) that’s perfect for everyday use, whether for errands, storing sewing supplies, or carrying books and fabrics.  

I found a beautiful tutorial and pattern for the “DIY Tote Bag With Pockets” by Qrei Handmade, and I was using the same principles and construction, but adapted it to a slightly bigger size. It features two practical side pockets, a spacious interior, and a sturdy, structured look that still feels soft and handmade. I couldn’t resist adding front pockets — the space between the handles was just asking for them!

The video is great to watch and very detailed, so I will just add the measurements that I've adopted for my bag.

Here's a list of materials & Cutting

PieceCut fromSize (cm)Notes
Outer bag front & backMain fabric13" × 17" (2 pieces)
Lining front & backLining fabric13" × 17" (2 pieces)

Front Pocket panelsMain or contrast10" × 16" (2 pieces)
Side pocketsContrasting fabric 7" × 16" (folded on the longer side-2 pieces)
Interfacing / stabilizer
same as outer piecesFor added structure
(Optional) small pocket insideFabrice.g. 13" × 14"  (1 piece folded in half and divided in two compartments)For internal storage

Zipper                                                      16" long (1 piece)

Recessed ziper panels    Fabric                2" x 14" (2 piece main + 2 pieces lining)                     

Handles                        Jute webbing       40" (2 pieces)    

Gusset                          Main or contrast   4" x 40" (1 piece main + 1 piece lining)    

Hook tabs                     Main or contrast   4" x 6" (1 piece to be cut in two)

Seam allowances: plan for 1 cm seam allowance all around (or whatever your machine standard is — adapt consistently).


If you’ve been wanting to sew a functional yet beautiful tote bag, this is a great project to try — easy to follow, beginner-friendly, and full of possibilities for mixing your favorite prints and textures. 


Thursday, 17 July 2025

Celebrate the Most Magical Time of the Year with Adventale Fabrics


🎄 Christmas in July, anyone? 🎁

When I first started designing Adventale, I pictured a cozy, classical Christmas — think forest greens, cranberry reds, warm candlelight…
But somewhere along the way, something magical happened. ✨
The sketches softened, the reds blushed into pinks, and golden accents quietly tiptoed in like morning frost catching the first light. And suddenly, I knew — this collection wasn’t meant to follow tradition. It was meant to reimagine it.

Adventale became my ode to a Pink Christmas — whimsical, vintage-inspired, full of softness and sparkle. Think warm gingerbread tones, sugarplum pinks, snowy whites, and glimmers of gold foil. It’s festive, but in a dreamy, slightly unexpected way — and somehow, it feels even more nostalgic because of it.

My latest fabric collection, Adventale, was created with this very idea in mind — to celebrate the magic of the season with love, light, and a little sparkle. From cozy quilts to thoughtful gifts, Adventale invites you to make this season more meaningful, stitch by stitch.

Whether you're decorating your space, preparing heartfelt gifts, or simply embracing the slower rhythm of winter creativity, Adventale offers the perfect blend of elegance and festive charm.

✨ Looking for inspiration?

I'm so thrilled to share the inspirational Adventale LOOK BOOK and three beautiful blog posts from the AGF team that highlight what you can make with this collection:

🌟 Celebrate the Most Magical Time of the Year with Adventale Fabrics
A closer look at the collection, the story behind the designs, and all the creative possibilities—from quilts to fussy-cut ornaments.

🧵Make a Fabric Stocking Gift Card Holder
A sweet, quick project perfect for handmade gifting! Great for using Adventale scraps or panels.

🏠 Decorating Our Homes with Handmade Cheer

Festive pillows, banners, and home decor ideas to bring handmade warmth into your holiday space.

✂️ Free tutorials on the blog

I’ve been stitching up little treasures with Adventale fabrics, and if you'd love to try too, I have two free tutorials available:

👜 Kiss Lock Frame Pouch– perfect for gifting or keeping something special for yourself.


🎁 Quilted Boxed Pouch (updated version) – now with helpful tips for working with directional prints. Both are beginner-friendly and totally addictive!

🎀 Introducing: The Adventale Ribbon Collection

I’m also thrilled to share a new addition to the Adventale world — the Adventale Ribbon Collection!

This beautifully curated line brings the soft, wintry essence of Adventale to a new medium — perfect for gift wrapping, sewing, journaling, or adding a handmade touch to just about anything.

🌿 Available July 2025
🎁 Ideal for makers, crafters, and gift-givers
💌 Limited release — once it’s gone, it’s gone!

Designed with the same warmth and storybook charm as the fabric line, these ribbons are a dream to work with—and I had so much fun designing them! Using them on my first project (a pouch!) felt like an absolute dream.

🏠 Don’t miss the matching Christmas Village wallpaper

These snowy motifs are also used in my matching wallpaper design available in my Spoonflower shop.


🧵 New Quilt Patterns in Adventale

The Adventale fabric collection truly comes to life through four quilt patterns I created (with some incredible friends!) to celebrate its magical spirit.


💖
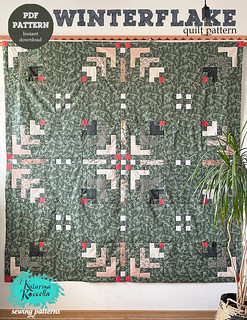
Snowflake Magic – a delicate celebration of winter geometry using my beloved Winterflake quilt block.

💎 Bazaar Diamonds – created by my amazing friend Marija, this one plays with contrast and angles for a bold, striking look.

🌌 Sawtooth Sky– created by my wonderful friend Sue, this pattern has soaring stars and gentle movement, now also with a FQ-friendly bonus version.

🏠 Cabin Spark – made by Alicia, this beauty merges the timeless log cabin with sawtooth stars—perfect for your favorite fat quarters.

Each quilt is a love letter to winter’s cozy magic and was made to let Adventale shine—stitch by stitch.

💬 Use code PROMOPATTERNS to get 20% off in my shop!
👉 Visit my Etsy shop for more patterns and inspiration!

Wishing you a magical, creative, joy-filled July — and a Pink Christmas in the making.
Happy summer & happy stitching,
Katarina 

Tuesday, 8 July 2025

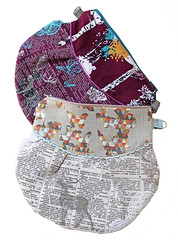
Wooden kiss lock frame pouch bag

When I spotted this beautiful 6" wooden kiss lock frame at a local craft shop, I couldn't resist picking it up. It came with a set of small screws—perfect for securely fastening the layers of fabric sandwiched together.

There’s something so satisfying about that click of a wooden kiss lock frame closing around your handmade creation. These retro-inspired pouches are perfect for carrying small essentials—or gifting with flair.

Feel free to download the paper template I used for this bag.


🧵 Materials You’ll Need:

  • Outer fabric: 2 pieces (10" x 14") – quilting cotton or linen works beautifully

  • Lining fabric: 2 pieces (10" x 14")

  • Fusible fleece, foam or batting: 2 pieces (approx. 9.5" x 13.5")

  • 6" wooden kiss lock frame 

  • Coordinating thread

  • Fabric glue (optional, but helpful for positioning)

  • Your usual sewing tools: scissors/rotary cutter, pins or clips, iron, sewing machine

✂️ TIP: If you're using directional fabric, make sure your pattern faces up from the bottom of the pouch!


Step 1: Cut your outer and lining fabrics using this template

As my main fabric wasn't directional, I cut it as a one piece, rather than 2, shortening the central part (bottom seam allowance line).

Step 2: Fuse the Fleece

Iron the fusible fleece (or foam) to the wrong side of your outer fabric pieces or simply quilt the batting to the main fabric for more textured look, like I did.

This gives your pouch structure and a soft feel.

Step 3: Sew the Outer & Lining Pieces

Outer Fabric: Place right sides together and sew around the sides and bottom using a 1/2 " seam allowance.

Lining Fabric: Repeat the same process but leave a 2–3" turning gap at the bottom.

Step 4: Join Outer and Lining

  1. Turn the outer pouch right side out. Keep the lining inside out.

  2. Nest the outer pouch inside the lining—right sides should be facing.

  3. Align and clip top edges and sew around the entire top curve.

  4. Pull the outer pouch through the gap you left in the lining.

  5. Stitch the gap closed with a small ladder stitch or machine-stitch close to the edge.

  6. Push the lining into the pouch and give everything a good press.


Step 5:  Attach the Wooden Frame
  1. Slide the top edge of your pouch into the frame evenly.

  2. You can use a small amount of fabric glue to hold it in place.

  3. Use the screws to fix everything together for extra security.

  4. Repeat on the other side.


I also stitched up a matching fabric and my Adventale Renaissance ribbon handle, embellished with piping for an extra touch of flair.


I hope that this was helpful! I certainly loved creating mine!!!


xx,
Katarina