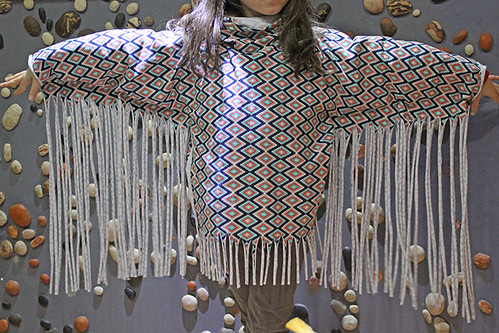
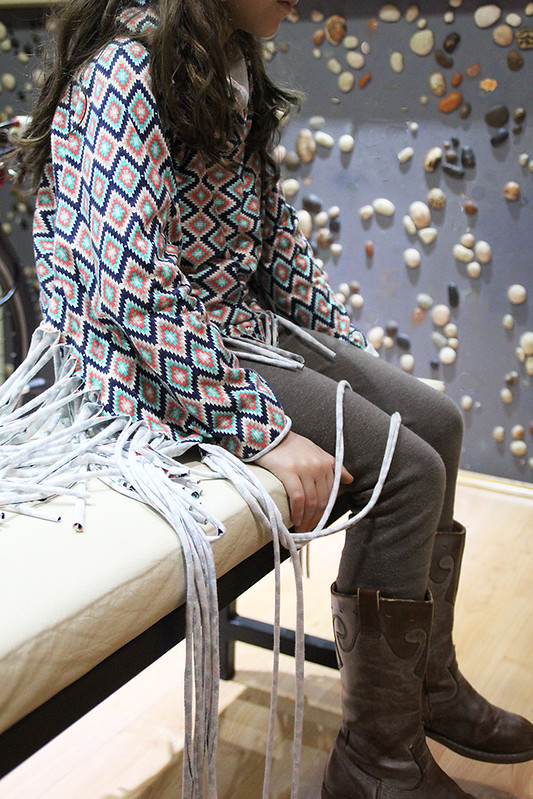
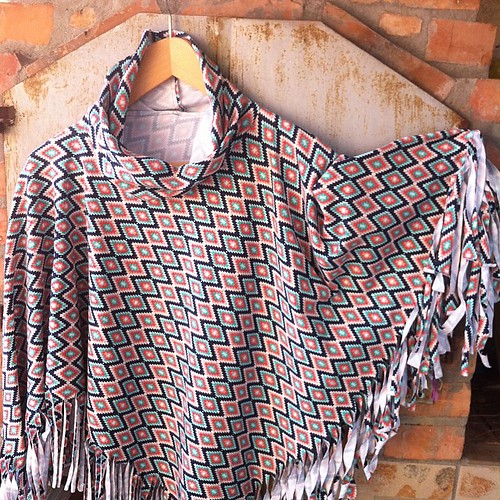
If you are on of those people willing to try knits , but have fear of this stretchy fabric, then this is the perfect project for you. It's suitable for kids and adults as well. It comes in 2 different versions :)
4 years ago, I wrote about
THIS great project with knits (it would make a perfect gift), so maybe you can try that one as well? So easy!!!
Anyway, back to the fringe poncho and sewing with knits:
the most important thing is to use ball point needle (for stretchy jersey and knit fabrics) and to be sure, that according to your needle size and thread that you will use, to adjust the thread tension on your machine. For the parts of your clothes that will need some stretching, use the zig zag stitch or the twin needle. That's basically all you need to know for the begging, the rest is all about practice and experience ;)
Once I started using a serger I fell in love with sewing knits! It's something else!!! But, luckily, this tutorial has barely 2-3 straight stitches, and you will not need a serger for that. What I love about knits is that the hem is easy-rolling (the fabric edge gets rolled up), this means that for some projects you don't need hem finishing (which for some people can be very nerve wracking).
So let's get started!
 You will need:
- 1 - 1. 5 yard of jersey knit fabric (depending on the size)
- scissors
- rotary cutter (with sharp blade)
- sewing machine
- stretch needle 70/10
- thread
- pins
- paper adhesive tape
You will need:
- 1 - 1. 5 yard of jersey knit fabric (depending on the size)
- scissors
- rotary cutter (with sharp blade)
- sewing machine
- stretch needle 70/10
- thread
- pins
- paper adhesive tape
It is very important to determine the measurements for the poncho:
1. for the width <--->
2. for the length ^
You can maybe understand it better if looking at this picture (that's from my
kaftan tutorial )

Take those measurements from your child (or you) or from the person that you are sewing this for, using the tape measure. According to that buy/cut the knit.
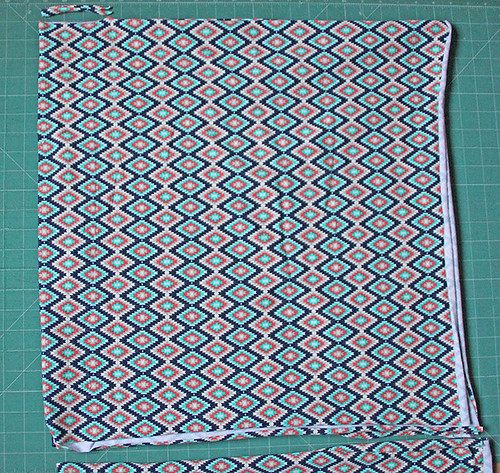
You should know that knit comes in very abundant width of 58/60", which is great for all the garment projects and sizes.

So looking at the above picture, you will notice that the 58/60" width of the fabric ( my cutting mat is 36 x 24") was cut to 44".
That way I got the square of 44x44".
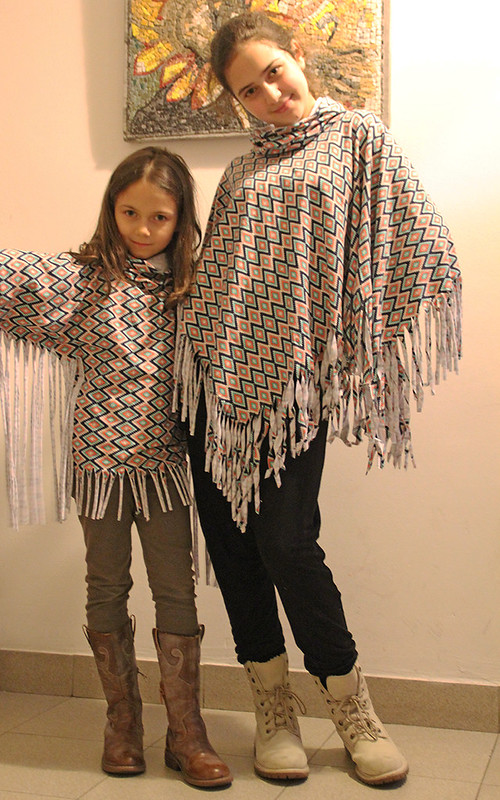
I have used the same 44x44" fabric piece for both types-styles of poncho.
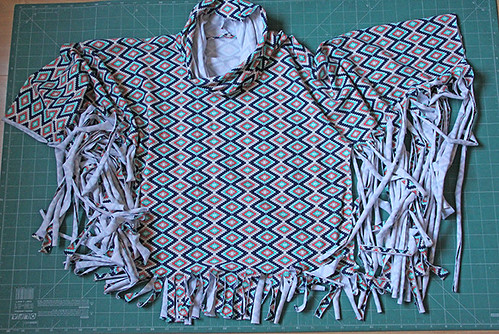
So let's see the STYLE #1 first, rectangle poncho fringe, great for toddlers!
RECTANGLE FRINGE PONCHO-style 1
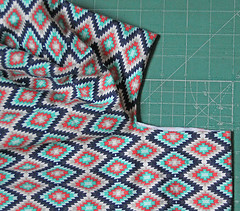
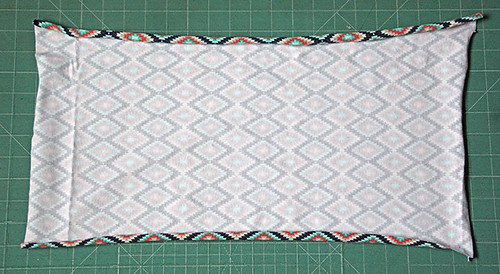
Step 1. Cut the fabric upon your measurements.
The width of the fabric - 58/60" will be left like that for XL women size. All the smaller sizes are to be determined by the wrist to wrist measurement. My 7 yrs old daughter has the wrist to wrist measurement of 44", so that was my width cut. The length of the fabric is to be determined by the desired length of the poncho, doubled (for front+back). I wanted the poncho for my daughter to be 22" long, so I used 44" as length. That's why and how I got the 44x44" square.
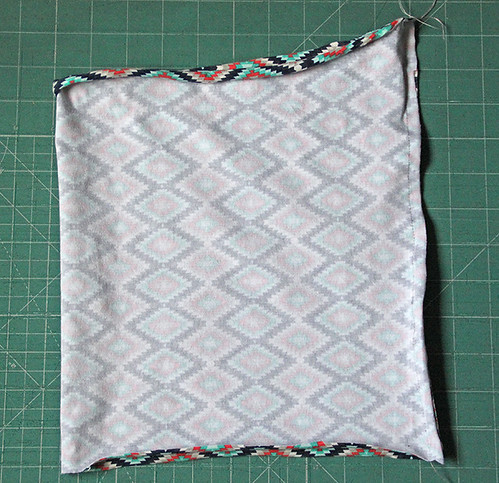
 Step 2.
 Place your piece of the knit fabric on the cutting surface, folded in half width wise (to find the center) and cut out the neck opening that is approx. 3 x 0.5" (once opened the fabric it will be 6 x 0.5") like shown on the picture. If you are cutting in smaller sizes cut it to be full opening 4-5" x 0.5". If cutting it in bigger sizes, cut it to be full opening 7" x 0.5"
 Step 3.
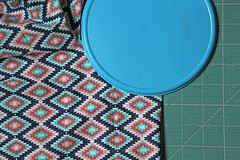
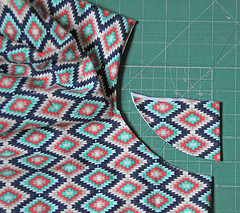
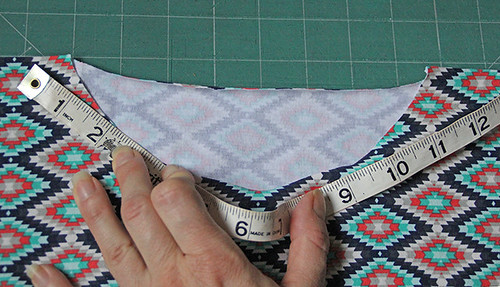
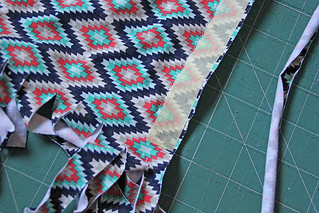
 Fold the fabric lengthwise (be precise with finding the center), so that the cut hole can be further cut in order to obtain the round shaped neckline. You can use some round shape to help you with cutting it perfectly. I have cut it at 2.5".
 Step 4.
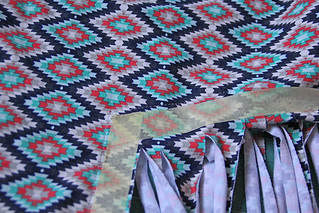
 This is the neckline we got. As many people have problem with making nice, round shape hemmed neckline, we will make the turtle neck. To create that, we need the additional wide fabric strip - rectangle.
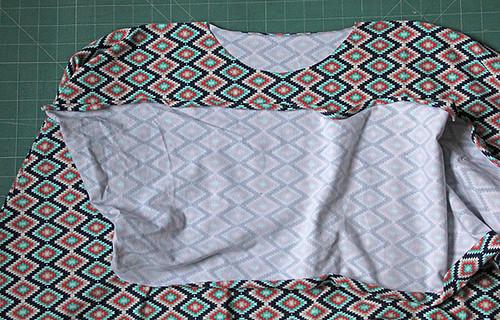 Step 5.
 You can determine yourself how long you wish the turtle neck to be. As I've cut my fabric width from 58" to 44", I had the leftover strip of 14", so I used that as the length.
 Step 6.
 To obtain the other, bigger measure of the rectangle, measure the circumference of the neckline opening. In my case it was 19". To that measure add 1/2" for the seam allowance(1/4"+1/4").
 Step 7.
 So, my rectangle was measuring 14 x 19. 5". Be sure to match the fabric print direction.
Step 8. Sew the rectangle on the shorter sides, right sides inside.
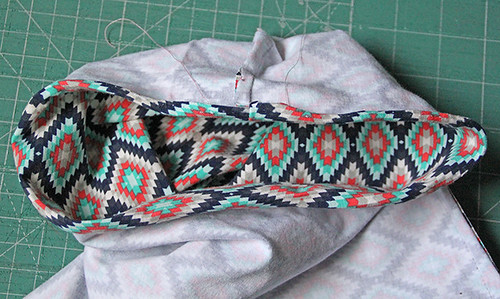 Step 9.
 You can decide if you want to leave the final hem rolled (like I did) or you can fold the edge and hem it using the zig zag stitch or double straight stitch (with twin needle).
 Step 10.
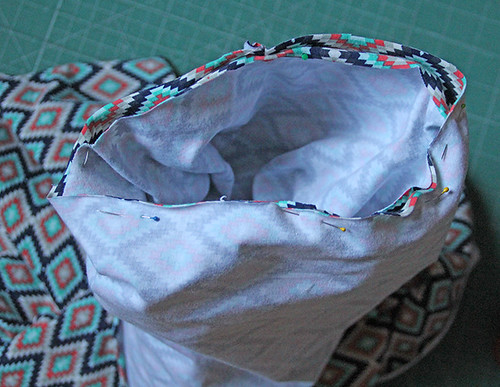
 Pin and sew the other side of the turtle neck "tube" to the neckline, right sides together. Start pinning and sewing from the center of the back side where you will position the seam.
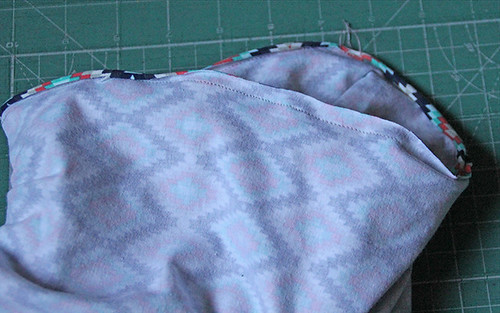 Step 11.
 Your turtle neck is done.
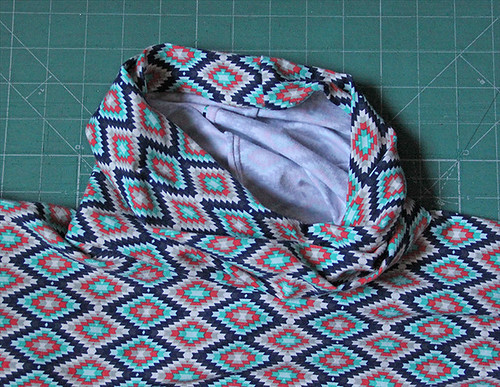 Step 12.
 Now the fringes.

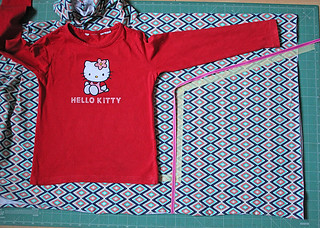 Step 12.
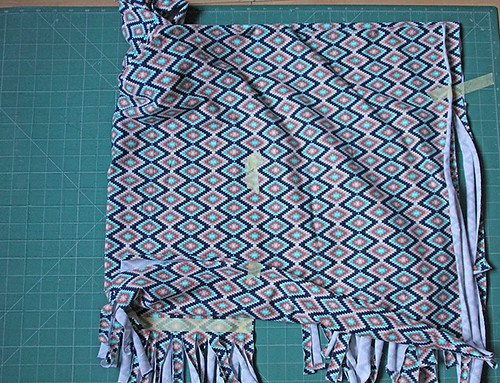
 You have to determine the side seams (in my picture it's shown with pink ribbon). The best way to do that is to place any regular tee-shirt and add approx. 2" all way around, as shown in the picture.
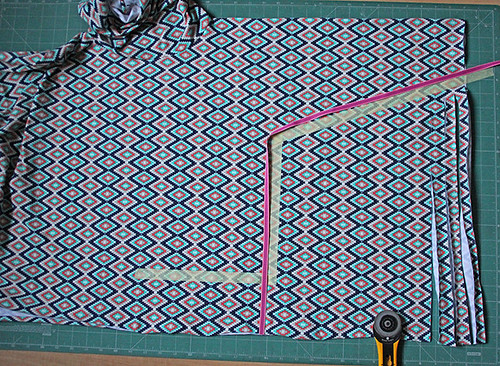 Step 13.
 Using the
paper adhesive tape, define the cutting edges. Start cutting the narrow strips, about 0.5" wide.
 Step 14.
 Fold the poncho in half width wise, to transfer the defined shape to the other side.
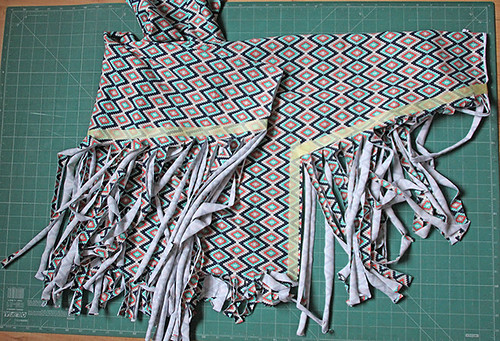 Step 15.
 With the sewing machine, sew a stitch along the inside side of the adhesive tape.
 Step 16.
 Remove the adhesive tape and you are done!!!!
Again, if you don't like unfinished sleeve hems, just fold the edge and hem it using the zig zag stitch or double straight stitch (with twin needle).
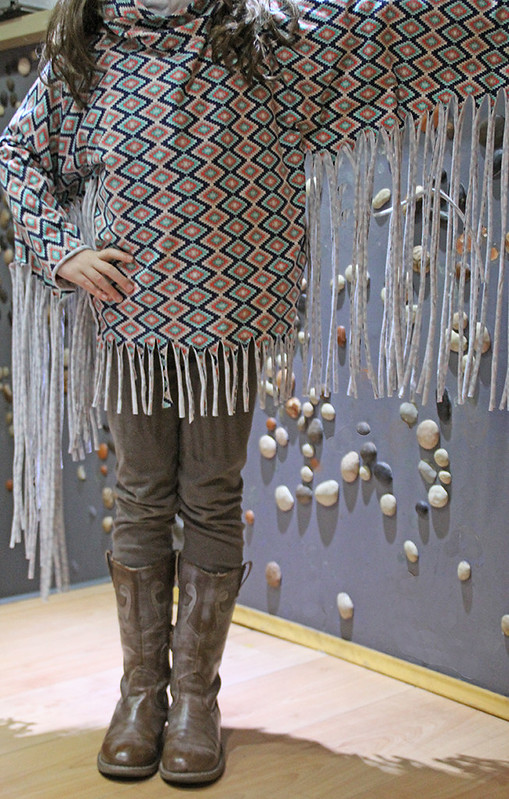 RECTANGLE FRINGE PONCHO-style2
Step 1.
RECTANGLE FRINGE PONCHO-style2
Step 1. Cut the fabric upon your measurements.
The width
of the fabric - 58/60" will be left like that for XL women size. All
the smaller sizes are to be determined by the wrist to wrist
measurement. My teenage daughter has the wrist to wrist measurement of
50", so that was my width cut. The length of the fabric is to be
determined by that same measurement, as it has to be the square. That's
why and how I got the 50x50" square for this style. This is equivalent
to an S adult size.
 Step 2.
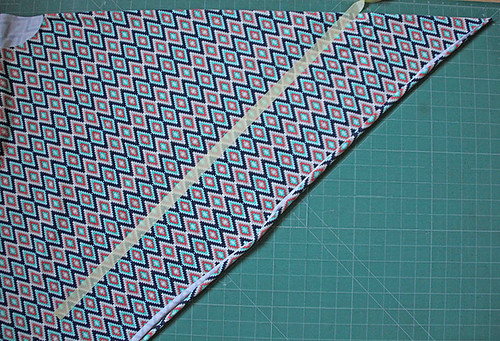
 Fold the fabric square on the diagonal square line in
order to obtain triangular shape. Place your piece of the knit fabric on
the cutting
surface, folded in half width wise (to find the center) and cut out the
neck opening that is approx. 3 x 0.5" (once opened the fabric it will be
6 x 0.5") like shown on the picture. If you are cutting in smaller
sizes cut it to be full opening 4-5" x 0.5". If cutting it in bigger
sizes, cut it to be full opening 7" x 0.5"
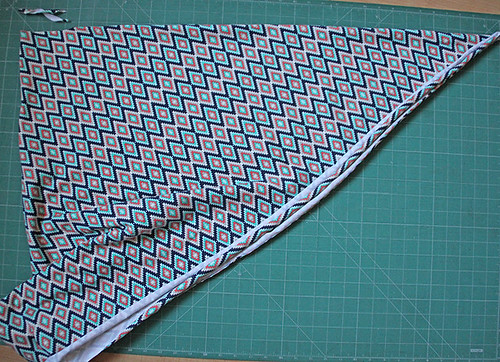
I made this style as an example of 0 sewing involved, for people that can't sew.
That's why on the following pictures, I have left the neckline just as it is, round-shaped.
To make the round shaped neckline, repeat the
step 3. from the first rectangle style #1.
For the turtle neck, repeat the
steps 4-11 from the first rectangle style #1.
 Step 12.
 You now only need to determine the fringe length using the adhesive paper tape.
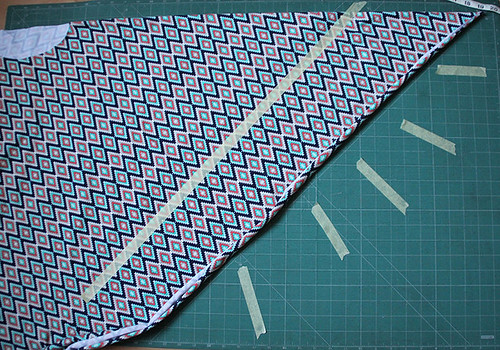 Step 13.
 You can make to yourself (like I did) some cutting marks on the mat, that will help you with the cutting direction of the fringes, as you are changing angle, going toward the center line.
 Step 14.
 Using the
paper adhesive tape, define the cutting edges. Start cutting the narrow strips, about 0.5" wide.
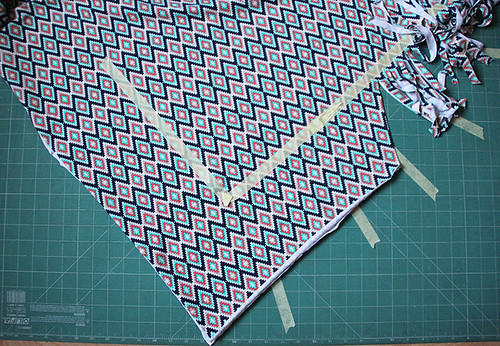 Step 15.
 Fold the poncho in half width wise, to transfer the defined shape to the other side. Cut the fringes all way around.
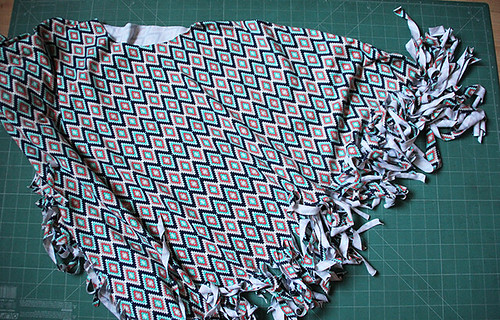 Step 16.
 Remove the adhesive tape and you are done!!!!
Happy sewing!
Katarina


 SOAR
SOAR
 BARCELONA
 ADVENTALE
 PLENTIFUL
 EERIE
EERIE
 ABSTRART
 FLORENCE
 WINTERTALE
 SEEDLING
 MINDSCAPE
 BOTANIST
 ECLECTIC INTUITION
 CAPRI
CAPRI
 TWENTY
 BOSCAGE
 AQUARELLE
 PICTURESQUE
 EARTHEN
 FLORALISH
 GRID
GRID
 DECADENCE
 MEDITERRANEO
 ESOTERRA
 INBLUE
 BLITHE
 PANDALICIOUS
 LAVISH
 AVANTGARDE
 WONDERLAND
 IMPRINT
 SKOPELOS
 RECOLLECTION
 INDELIBLE


