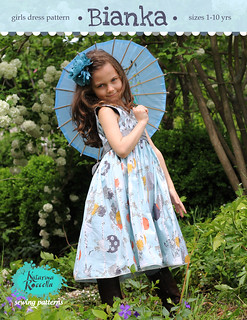
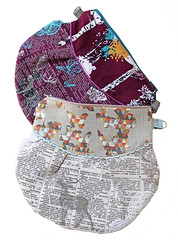
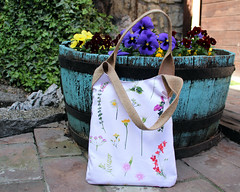
During this summer, I created several sewing templates(patterns) and they are available for purchase @ Spoonflower.

 Each sheet is created as 18 x 21" large (size of the Fat Quarter) and includes the sewing instructions. So beside the fabric FQ, you will need either Velcro tape for closure or snaps. Also, I would highly recommend using additional fabric for the back sides, like minky, terry cloth, chenille, cotton backing or similar fabric.

Very important thing to do before starting to sew is to wash the fabric, as it will shrink. I also recommend to wash even the fabric that you will be using for backing, as in that way there will no be unpleasant surprises with shrinkage after you get the final product, and as this item is designed for babies, washing fabrics before use is a must do:)
Needed supply:
1. printed fabric sheet with template ( you can use the fabric type you prefer for the design to be printed on like: Quilting Weight Cotton, Organic Cotton Sateen or Organic Cotton Interlock Knit and for the limited time even the great cotton poplin fabric would be perfect)
2. thread, scissors and needle
3. pieces of Velcro or snaps for closure
sewing machine is optional-you can totally stitch it with hand, as it is a small surface;)

So, the fabrics are washed and ironed, ready to be cut & sewn.

To cut the bibs from the fabric template, I recommend the zig zag scissors, as in that way you will have nicer and easier sewing (without further need to eventually trim the pieces). HERE you can find very nice article explaining why trimming the corners in sewing. I must admit that I am not doing this always, (and in the following pictures you will notice that I haven't do that because I used very narrow seam allowance), but with larger curves, it is really the best way.


After cutting the bib from the template, be sure to fold it lengthwise and check if both sides are the same (as the fabric will be shrinked, it is possible to have some minor discrepancies) and if needed, adjust the shape with scissors to obtain the equal sides.

Using the front bib shape, cut the same shape in backing fabric.

If using velcro, in this stage you can sew them in place, if prefer to not have the sewing lines visible, so you will have this situation:

And in this picture you will note the difference between sewing the Velcro at this stage or in the end.

So regarding this detail, choose yourself, but note that sewing the Velcro as the last thing is much easier;) Just sayin'. If you prefer to sew the Velcro at this point, be sure to cover the opposite pieces on the top of each Velcro piece,(that you can remove-strap after turning the bib inside out) as otherwise it will be very hard to turn the bib inside out through the gap( it may get stuck and damage the fabric)

Ok, so you need to place the front and back pieces on the top of each other, right sides together and pin them.

Sew the bib using the max. 1 cm (1/4") seam allowance and leaving the bottom gap open that will allow turning the bib inside out

Now, you can trim the bib (if still haven't) and turn it inside out and press the bib with iron

Stitch the outside of the bib all around, catching the opening closed this way

Sew the Velcro fastening at this point(suggested) in rectangular or circular shape upon preferences or apply the snap buttons on the marks (be sure that they will match properly-one side with another when the bib is connected)
Done:)


Hope you like it:)
Katarina
Very important thing to do before starting to sew is to wash the fabric, as it will shrink. I also recommend to wash even the fabric that you will be using for backing, as in that way there will no be unpleasant surprises with shrinkage after you get the final product, and as this item is designed for babies, washing fabrics before use is a must do:)
Needed supply:
1. printed fabric sheet with template ( you can use the fabric type you prefer for the design to be printed on like: Quilting Weight Cotton, Organic Cotton Sateen or Organic Cotton Interlock Knit and for the limited time even the great cotton poplin fabric would be perfect)
2. thread, scissors and needle
3. pieces of Velcro or snaps for closure
sewing machine is optional-you can totally stitch it with hand, as it is a small surface;)
So, the fabrics are washed and ironed, ready to be cut & sewn.
To cut the bibs from the fabric template, I recommend the zig zag scissors, as in that way you will have nicer and easier sewing (without further need to eventually trim the pieces). HERE you can find very nice article explaining why trimming the corners in sewing. I must admit that I am not doing this always, (and in the following pictures you will notice that I haven't do that because I used very narrow seam allowance), but with larger curves, it is really the best way.
After cutting the bib from the template, be sure to fold it lengthwise and check if both sides are the same (as the fabric will be shrinked, it is possible to have some minor discrepancies) and if needed, adjust the shape with scissors to obtain the equal sides.
Using the front bib shape, cut the same shape in backing fabric.
If using velcro, in this stage you can sew them in place, if prefer to not have the sewing lines visible, so you will have this situation:
And in this picture you will note the difference between sewing the Velcro at this stage or in the end.
So regarding this detail, choose yourself, but note that sewing the Velcro as the last thing is much easier;) Just sayin'. If you prefer to sew the Velcro at this point, be sure to cover the opposite pieces on the top of each Velcro piece,(that you can remove-strap after turning the bib inside out) as otherwise it will be very hard to turn the bib inside out through the gap( it may get stuck and damage the fabric)
Ok, so you need to place the front and back pieces on the top of each other, right sides together and pin them.
Sew the bib using the max. 1 cm (1/4") seam allowance and leaving the bottom gap open that will allow turning the bib inside out
Now, you can trim the bib (if still haven't) and turn it inside out and press the bib with iron
Stitch the outside of the bib all around, catching the opening closed this way
Sew the Velcro fastening at this point(suggested) in rectangular or circular shape upon preferences or apply the snap buttons on the marks (be sure that they will match properly-one side with another when the bib is connected)
Done:)
Hope you like it:)
Katarina





















 GRID
GRID
 DECADENCE
