. . . . . . . . . . . . . . . . . . . . . . . . . . . . . . . . . . . . . . . . . . . . . . . . . . . . . . . . . . . . . . . . . . . . . . . . . . . . . . . . . . . . . . . . . . . . . . . . . . . . . . . . . . . . . . . . . . . . . . . . . .

Saturday, 9 April 2016

Lavish


Let me tell you a bit more about my freshly released fabric collection: Lavish.
The official AGF description describes it as: Watercolor brushstrokes and an appreciation of the nearby flora, come together in beautiful colors inspired by the subject itself. Opulent, overflowing petals, stems, buds, and hidden berries make up this flower scented collection and release a fresh and fragrant aroma to delight the eye.


If you happen to follow me here for a longer time (can't believe that I started this blog more than 8 years ago), you might know that we have a weekend house in the nearby mountains of Fruska gora.
It's our little getaway place where my parents almost decided to completely move to and where the nature can be enjoyed and explored in full. It's the place where I am planning to make my studio one day, hopefully soon.


Indelible from Katarina Roccella on Vimeo.


NORDIKA Fabric Collection by Jeni Baker from Art Gallery Fabrics on Vimeo.

My Indelible video was filmed there, and also the video that I filmed for Jeni's Nordika collection.
So, all the flowers, berries and grass from this collection is seen, photographed and painted there.


Let me show you more of my photos that served me to put this collection of mainly floral prints together.


This is my mom's garden. It's a beautiful mix of wild flowers and those planted. My mom loves to plant flowers and her garden always looks amazing, especially in summer when it’s full of chamomiles, daffodils, cosmos, lush poppies and other small wild flowers. The garden's look changes from spring to late summer, but it is always full of colours and shapes to be admired and to be inspired with.
Hens, the print: MOTHER'S GARDEN.


It took a lot of time to put this print together, but I think it's as far the favourite print of mine.


It has a sentimental and artistic value to me. It somehow gathers the feelings, the colors, the shapes. I can hardly wait to see it in use.


Another cute ditsy print in work ;) I think it can work as a nice coordinate print.
I hope that you got the idea. Can't wait for the look book to be out next week with many beautiful creations featuring this line.

Have a great weekend,
xx, Katarina

Monday, 4 April 2016

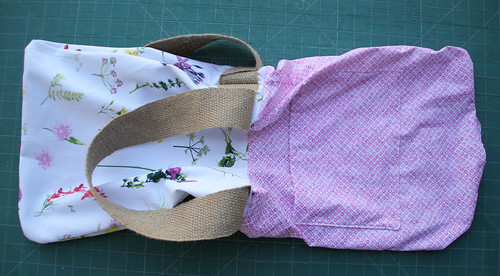
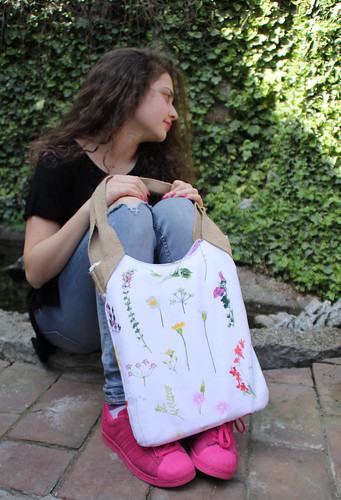
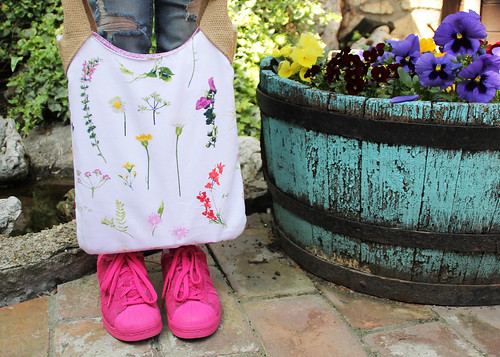
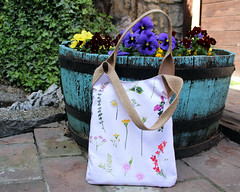
Lavish library bag tutorial


Spring has officially sprung and so my Lavish fabric collection is making it's appearance in the fabric stores! I didn't make any introduction post about inspiration and prints from the collection, but will do that very soon, once the look book will be out ;)


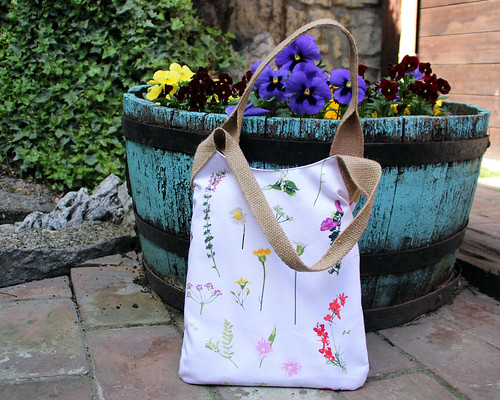
But, what I did almost the same moment I got fabrics, was to create a bag and a free tutorial for the bag, so that it may eventually inspire you to create something that easy and useful as well. For the first time, I used AGF canvas substrate to make a bag and I really love how it turned out, especially as it didn't require any additional stabilizer or interfacing, as the material is strong and has the perfect weight for bag making.
3

Finished size of this bag is: 14 x 11. 5".

Here is what you'll need:

Needed supplies:

1. fabric: 1 fat quarter of the canvas fabric for the main sides (canvas is 58/59" wide, so one fat quarter is 18 x 29")  + 1/2 yd of regular quilting weight fabric for the lining  
I used my Lavish C-26809 : Petal Picking Dainty fabric for the outside and LAH-16804
Seeds of Dahlia for the lining

2.  54" of 2" wide hemp or jute webbing for the handles
3. sewing machine, thread (for the best results - use Aurifil), scissors, ruler, rotary cutter, pins, iron
I used Aurifil 40wt and Schmetz leather needle (90/14)-great for medium to heavy weight fabrics and webbing

So, let's get started!

Prepare your fabrics (eventually wash them, if you prefer to prevent some shrinkage and press them nicely prior to cutting).

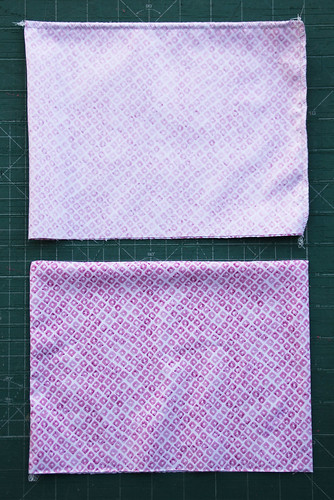
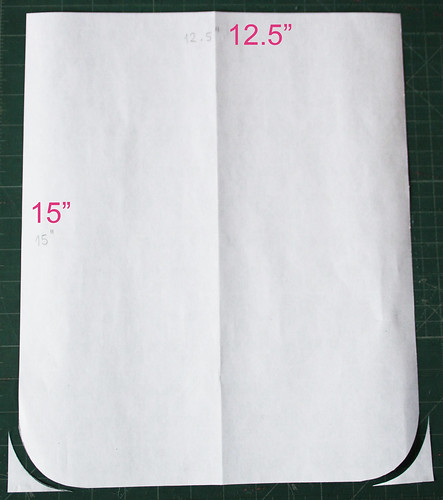
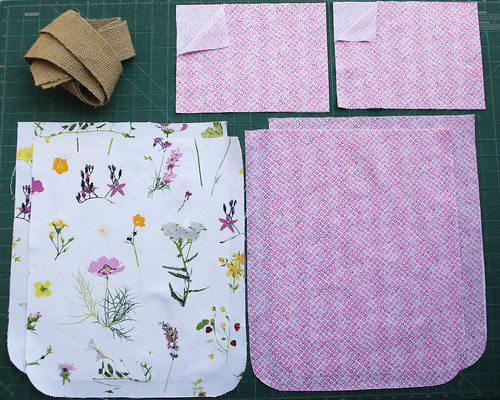
The good thing about this pattern is that you don't need to print and tape any paper template. If you want to make the bag in this dimension, like mine, just cut 2 rectangles measuring 15 x 12.5" each in the main fabric and also 2 rectangles, of the same size from the lining fabric. Additionally and as optional, you can use the left over piece of the lining fabric to make 2 inside pockets.
As you can notice, I rounded the bottom corners (because I didn't calculate any darts), using the round cup's lid.

38

37

But you can also make this bag much bigger in size, like maybe 18 x 16"- horizontally or vertically (in that case just be sure to add a bit more hemp webbing for handles and eventually make some darts to add more comfort inside and also, eventually add a magnetic snap closure inside - I am definitely making another bigger in size with these tips).

So, here's what we have and need:
36

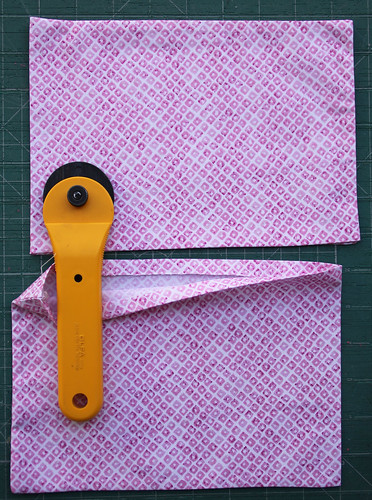
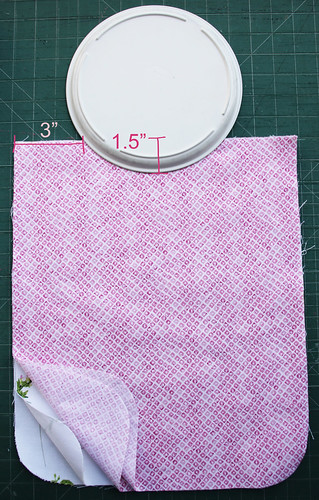
They can be used that way, or you can customize the shape a bit more, like I did, by opening a bit more the arm holes. As you can notice, I love "fancy tools"!!!
35

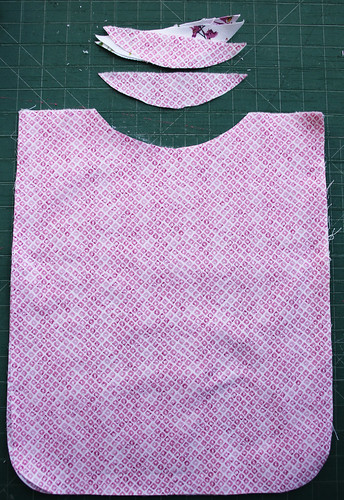
Here, much better, looking like giant bibs!
34

Now for the pockets (you can click on the pictures to allow better view):
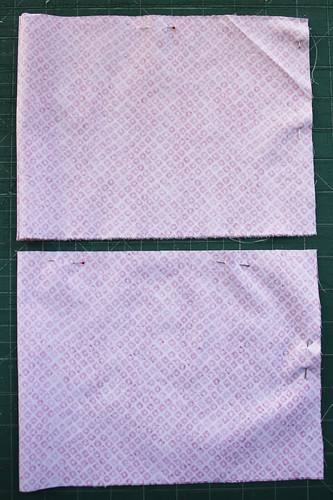
33 32 31

take two pieces of the lining fabric measuring 18 x 6.5" each, fold them on the shorter side, right sides facing, and pin on the two sides (one side has to remain open, allowing turning inside out). Sew these two sides closed and turn them inside out. Press them and also press the ends of the open side (approx. 1/4" seam allowance) inside. Pin the pockets to the both lining pieces.
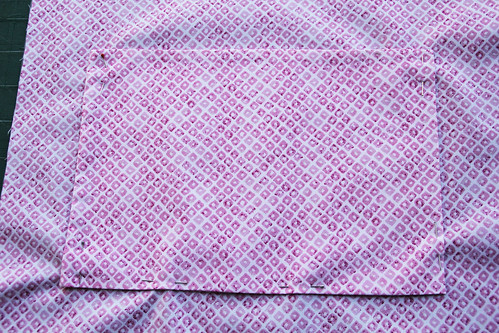
30

Sew the pockets on all 3 sides: laterals and bottom.
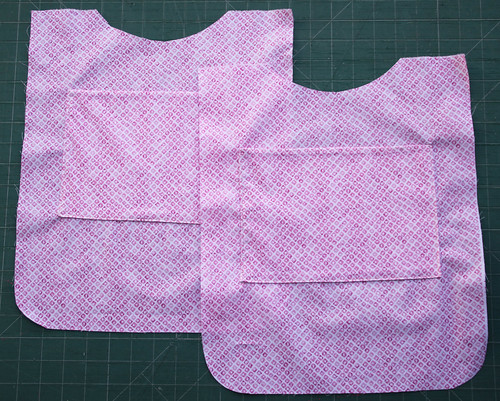
29

The inside parts are ready to be sewn together - so place them on the top of each other, right sides together, pin and sew all the way around, leaving the bottom gap open (approx. 6").
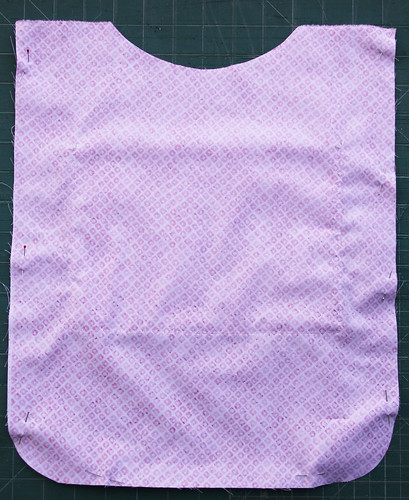
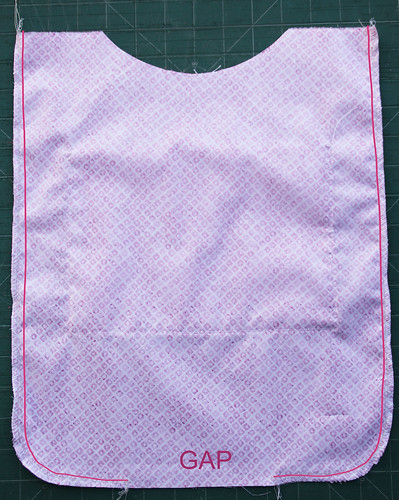
28 27

Now, let's prepare the main pieces: adding the hemp webbing handles to it:
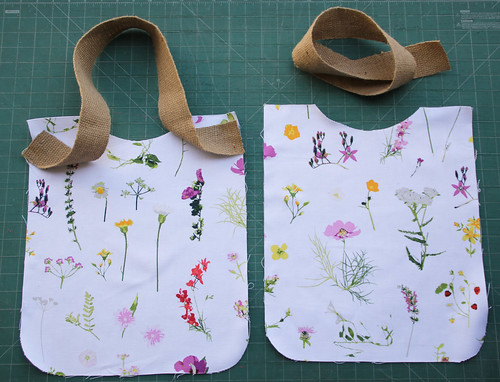
26

I used 27" long hemp webbing for each handle, but you can easy customize this  size according to the bag size or your need (if you prefer them shorter or longer, maybe).
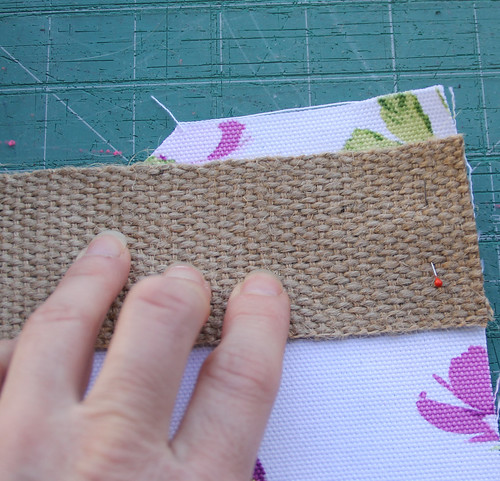
25

Pin the ends of the hemp to the both lateral sides, positioning them approx. 1/2" from the upper side (this will permit secure and easy sewing when joining the lining to the exterior fabric)
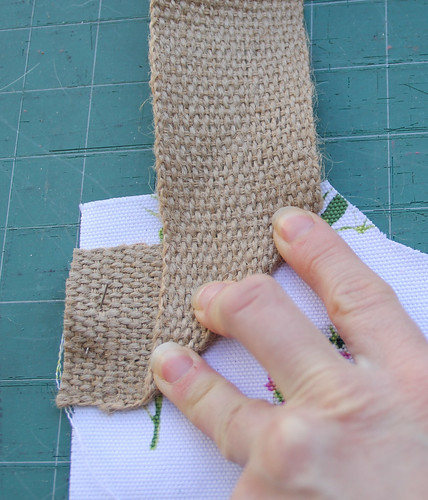
24

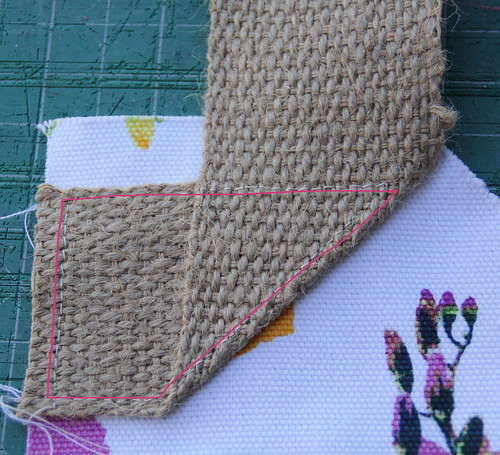
Now, turn the webbing like shown on the picture, guided by that nozzle made on the upper side, taking care that it's also a bit (like 1/2") away from the main fabric's edge (otherwise, you will have difficulty to sew).
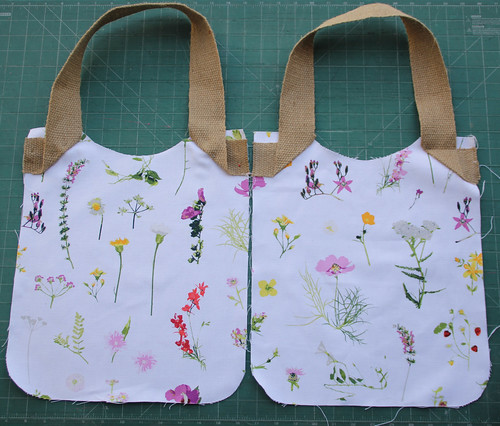
22

Pin and sew these endings like this:

21

Now pin and sew front and back outside pieces on the top of each other, right sides together.
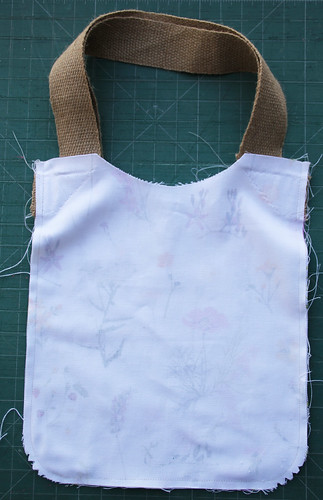

20

Clip the rounded corners a bit, to prevent scrunching.
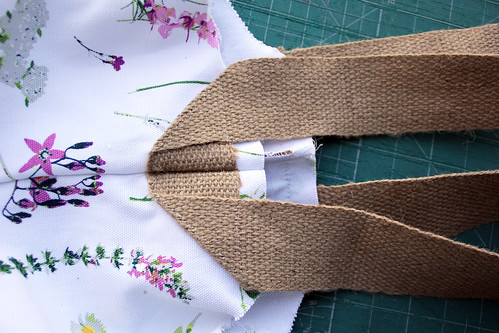
19

Turn the bag inside out.

18

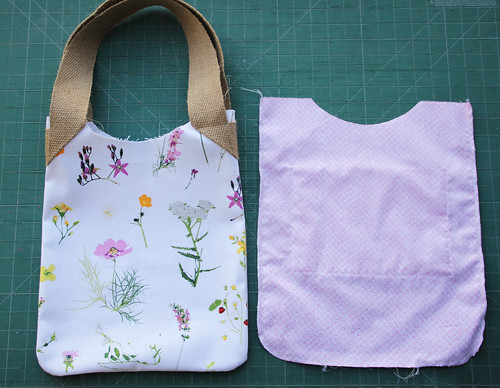
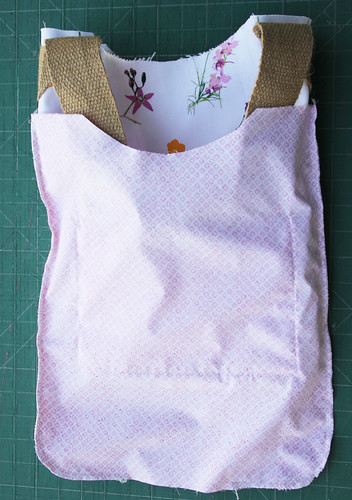
Place exterior part of the bag inside of the lining part of the bag, or vice versa (right sides together).
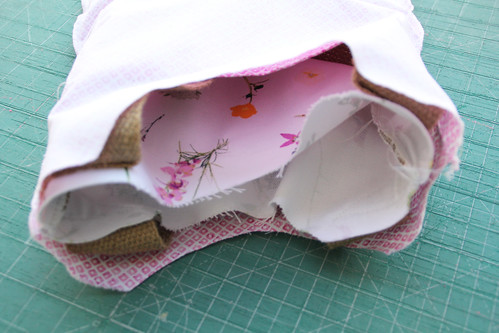
17


16

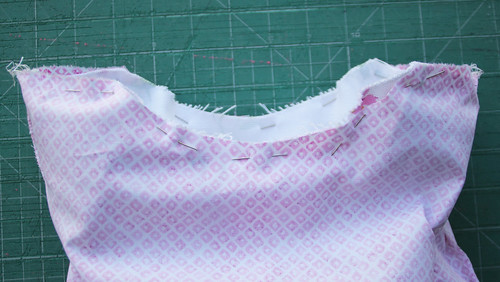
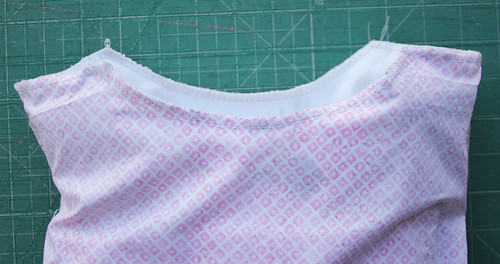
Pin and stitch the lining to the exterior, all the way around on the upper side, making sure that you don't entangle the handles.
15

14

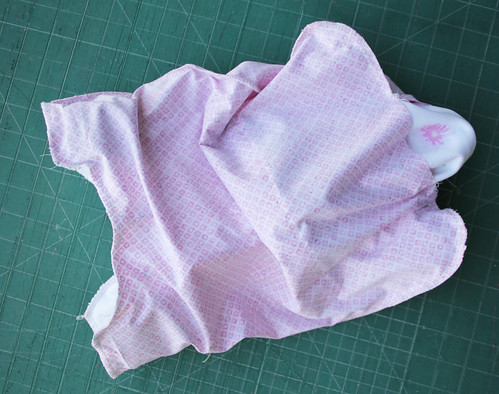
Turn the bag inside out through the lining's gap and stitch the opening gap closed.

13

12

Press the seam around the top line of the bag and do the top stitching, passing over the handles as well.
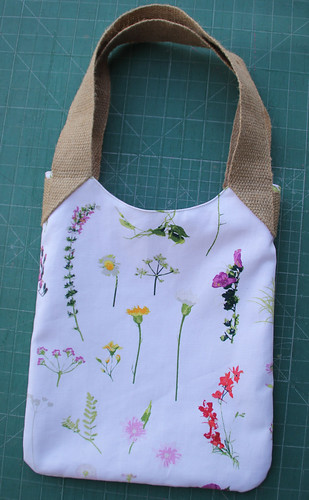
11

You can leave the handles as they are, or you can eventually stitch them by folding mostly the central part, that will go over your shoulder.
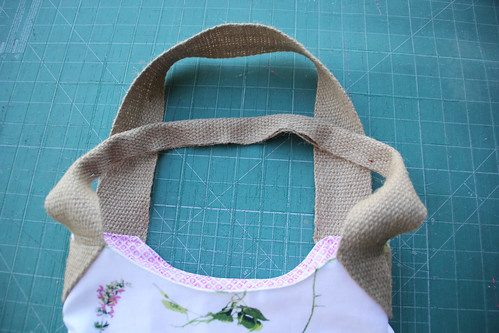
10

You can apply some nice decorative stitch or even hand stitch with some nice floss.
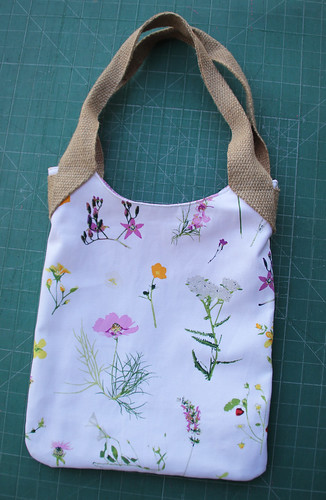
9

Hope that you like it :)

5

Happy sewing,
xx, Katarina

Monday, 7 March 2016

AGF stitched: Blithe quilt blocks


The new episode of AGF Stitched with Kimberly features the Blithe Quilt as part of great collaboration between Fat Quarter shop and Art Gallery Fabrics.
Of course, as well as with other videos and patterns presented by Fat Quarter shop, this one is no exception.


You can watch the entire clip with detailed tips and step by step instructions:


You can easily get everything you need to make this great quilt in FQS:
Pattern
Chalk and Paint (by Sew Caroline) Kit
Chalk and Paint (by Sew Caroline) Fabric Collection
Triangles on a Roll

Blithe quilt pattern is featuring Sew Caroline's latest beautiful fabric collection, Chalk and Paint, the quilt looks so pretty and and it sews very fast.

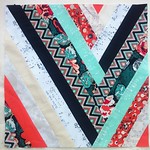
I couldn't wait to use my latest available fabric collection, Avantgarde and make some pillows for my home in Blithe blocks. I think that my balcony is ready for spring with these nice colorful accents ;)!!!!


Be sure to see all stunning versions of the quilt that brilliant makers participating in this episode made with different AGF collections.

Please visit these fabulous sites to see their versions of this beautiful quilt:

Quilt Dad
Quilt Story
 
xx,
Katarina

Wednesday, 3 February 2016

New Aurifil thread boxes


A few months ago, Art Gallery Fabrics decided to re-brand AGF designer Aurifil boxes to better match the identity of each AGF designer. Each of the boxes (large & small) come in a variety of thread weights, that was hand picked and curated by the designers to better match their designs and theirs collections.


My collection is a mix of colorful 40 wt threads and neutral 50 wt threads and is called Voluminous!
It's a perfect match to all of my fabric collections and can easily cover all kind of sewing projects from quilts and quilting to clothes and accessories.
Unfortunately, my first Aurifil thread boxes- Indelible will no longer be available, but you may be able to find them still somewhere...


So, to celebrate these great news, AGF is having 10 days of giveaways on Instagram!! You can enter to win the following prizes:

A mixed selection of prints from the featured designer's collection(s) with coordinating AGF solids. (15 fat quarters) A large box of the designer's Aurifil threads (12 spools) Small box of the designer's Aurifil threads (10 spools)

This giveaway will run for 10 days (weekends not included) starting Feb 1st. Each day a different designer will be featured, so feel free to re-post all the images you want. Each winner will be announced the following day, in the caption of that day's giveaway. (ei: Monday's winner will be announced on Tuesday and so on so and forth.)

My turn is on February 4th-tomorrow!!!! I am so excited!!!!

How to participate: please read carefully, as all steps will be verified. Private IG accounts aren't eligible to participate. This giveaway is open to those inside and outside USA (worldwide).

Follow on IG - @ArtgalleryFabrics, @aurifilthread + the AGF designer displayed in the image. (a different designer will be featured everyday) Tag 5 friends that you think, would love to participate in this giveaway. Re-post the image of the the bundle you will like to win, along with 2 Aurifill boxes. (as displayed in the image) When re-posting the image, let us know why, you would like to be the lucky winner of this $150+ prize. Remember to use #AURIFILforAGF to ensure your post comes out in our daily pool.

This giveaway is valued at $150+! Get ready to be in sewing paradise when creating with Aurifil threads and Art Gallery Fabrics.

You can check all the details on the Art Gallery Fabrics blog as well.

Good luck!