
Last year, when I created
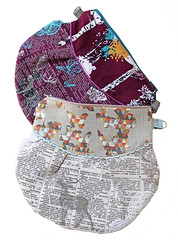
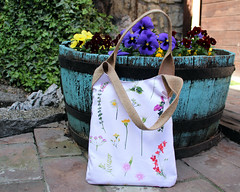
this bag, I mentioned writing the free tutorial. So finally, here it is.
You can see all pictures in bigger format
here in my flickr album.
The finished size of the bag will be approx. 16x12". If using regular quilting cotton, than you need to use the interfacing, and if using linen cotton canvas and cotton twill, you don't need any other additional interfacing fabric.
Needed supplies:
1.
fabrics - 1 1/2 yard for the 44" wide fabrics or 1 yard for the 54" wide fabrics
2.
interfacing - 1/2 yard
to obtain the more durable bag.....you can even use the piece(cut in the
long stripe) of some light interlining for the handles to obtain the
straps that would be padded and therefore would provide more comfortable
and durable wear
3.
sewing machine, thread, scissors, pins
4.
two buttons for closure
5.
2 metal rings and
2 Swivel clasp snap clips

Print the
BAG TEMPLATES
Template pieces includes:
1.
bag body and lining
2.
flap
Additionally you need to cut:
1.
handles ( 2 pieces) : 27 x 8"
- additionally if you want another long handle, cut 54 x 8"
2.
pocket: 30 x 10"
3.
loops x metal parts- one small strap- 2 x 10"
Instructions:

1. cut all pieces including the interfacing for the 2 main body pieces

2. on the dashed lines within the bag's body stitch the ribbon or other embellishment: there are many options to mix, match and combine, so be creative here:)


3-4. stitch the pocket: you can use the whole pocket piece number as one big pocket or you can cut it and make 2 smaller pockets to be sewn into the lining, after the embellishing line


5. use the small triangular parts on the bag’s body and lining(on the bottom line) to create darts


You can do the darts 2 ways:
visible (like I did on this bag)-that little triangular folded shape is visible outside or in classical - "
invisible" way (triangles are made on the inside) -like shown on the following picture.
There is even another version of making darts on each corner separately before sewing one side of the bag to the another. That's the method I prefer, but is a bit more complicated for the beginners-as they have to match nicely.
Here is one example how;)

6. don’t forget to snip the corners and clip the curves

7. make the handles- the fabric pieces number 5 : there are a few ways to create the handles, (where the inserts will be smaller or bigger-also depending on size of the material available), but the easiest way is to fold them in half lengthwise and iron it, then
open and press both sides toward the center crease, press center crease close again and stitch


If using the larger bag version, you will need to create also one large handle that will be attached and taken away easily with some rings and snaps

You'll need to make some small fabric straps and to pull through the snap clip on one end and the ring at the other. The second ring and clip will have to be inserted in the both sides of bag's body in the steps 10-11


8. using the pieces for flap (cut it on the central dashed line) create the flap by sewing the both pieces on the top of each other, right sides together, leaving the dashed line open as gap to turn. Make the button hole and sew the finished gap on the center of the outer side of the body bag on the center of the outer side of the body bag, placing the front and back pieces on the top of each other, right sides together


9. sew the buttons (being help with the other body part with the sewn flap, making sure it would be closed correctly) and sew the handles on both outer body parts


10-11. sew all around body to body parts and lining to lining parts right sides together,leaving the bottom gap open on the inner lining part of the bag that will allow turning bag inside out


12. place lining part inside of the body part of the bag(right sides together) and stitch all around the top


13. turn the bag inside out through the lining's gap and hand stitch the opening gap closed and
press the seam around the top line of the bag and do the top stitching(for security reasons)


Enjoy,
Katarina


 What I loved about Agnondas is that the beach was very close to the apartment and that there was plenty of shade from trees that come right down to the shoreline. There is a very narrow strip of sand and shingle in front to the tavernas, offering good food, especially fresh fish and other sea food.
 Agnondas beach shelves gently into the sea protected by the steep hills on either side of the bay so it is safe for children. Also, the bay is very protected from the prevailing winds and is sometimes used as a second harbour, when the weather is bad.


 On the main road between Agnondas and Skopelos town is a new dirt track(the first on the right after Agnondas) which branches though the forest leading to several secluded small coves at AMARANDOS or AMARANTOS where pines sweep right down to the crystal water's edge offering privacy and shade.



























 GRID
GRID
 DECADENCE





















 Posts
Posts

