
I am so excited to share with you my new quilting adventure!!!
It's been
a while since I wanted to try myself in proper patchwork and quilting.
I made
some patchwork cushions before and had a lot of fun with
sewing some clothes and other patched things, but after designing fabric, I really had the strong desire to learn more about real quilts, the designing and creating process. I have a few quilt books, but as well with designing clothes, I like to find my own way in doing things. So challenging myself with something that might not be the easiest project to do, might be the great way to learn more. Even because, sometimes the best way to learn is from the mistakes.


So till now, I almost finished the first side of my very first quilt!
So here are some pics from the very start, from selecting the fabrics,
choosing the patterns, cutting and assembling the fabrics.

While I was browsing the net and
leafing through quilt books in search of inspiration, I was attracted by the Drunkard's path tiles. I searched the net to find out something more regarding the history of these paths and here is what I found out:(from Pepper Cory's Easy Drunkard's Path Templates) :
"Drunkard's Path, the easiest quilt block pattern for learning to sew curved seams, is one of few quilt block patterns with a recorded history. The block was first seen in ancient Roman mosaics. By the 18th century the design emerged in England with the name Rob Peter to Pay Paul. When the pattern traveled to America in colonial times, new names appeared - Wanderer in the Wilderness, Rocky Road, and finally Drunkard's Path.

As I didn't have any particular ruler (that is sure quite handy for cutting these), I used a simple 8" plate to cut the curves, as my squares were 4". It's just very important to leave some space for the seams when cutting these;)

As I choose 6 different fabrics for this project, I made 40- 4" squares from each of the 6 fabrics(about 1/2 yard of each fabric). Finally I had 40 x 6 = 240 squares. There were 30 different fabric paths to create (each fabric combined with other 5 make 30 possibilities), so I had 8 Drunkard's paths of the each of the 30 possible pattern/designs.


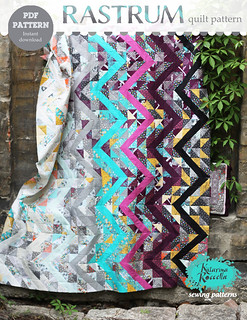
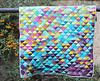
I had so much fun deciding about the pattern of this quilt and I really wanted to have some curved sort of the chevron. As the squares I created weren't enough to make a real size quilt, I inserted some strips of the antique calligraphy print and blend them together with other fabrics by adding some circle patches, randomly assorted.


So now the size of it is approx. 120 x 160 cm and I am not sure if I should add some more fabric, at least in length. For the other side of the quilt, I decided to go all stripy.
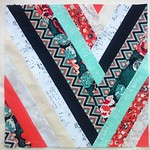
It will be something like I had
previously in mind , but I don't want the chevrons for this side, just some random striping and sort of improvisational patching. I hope to obtain some exciting and non expected images or paths and hope to have even more fun with this unconventional patching, without any particular design in mind. Some more artsy look, I hope:) But will see, hopefully soon!:)

I am a bit worried about how I will do the sandwich quilting after all, as the first side (with all those pieces) is not quite flat. I just hope that it's just an charming "handmade" aspect of quilting and not my ignorance. I know that in sewing clothes, if something is not perfect, it is just not good and hope that quilting might be a bit more forgiving;)
Any advices or suggestions are warmly welcomed.
xo, Katarina
























 GRID
GRID
 DECADENCE
















 Posts
Posts

