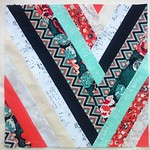
My Eerie fabric collection is already shipping and available in shops, and before doing the regular post introduction about the collection, I have prepared this fun pumpkin block tutorial.
Decorative pillow covers are the easiest and fastest way to change your home décor without a major investment. Bold and funky patterns can sometimes feel overwhelming if used in larger home décor projects but can be fantastic for smaller-scale projects like pillows. They add a touch of color and pattern to your home space. Additionally, quilting adds texture and stability to the sewing/piecing, while trimming around the edges provides a modern look.
To get the printable template, download it HERE.
The featured fabrics: “Creepy Crawlers Tang”, “In The Dark”, “Creepy Crawlers Cement” and “Seeds Olive” by Katarina Roccella for Art Gallery Fabrics.
Materials
For 1 pillow, finished size 14" x 13.5”
(I suggest adding sashing/borders around if bigger size is needed)
-Fabrics:
Fabric A: Creepy Crawlers Tang, Fat quarter
Fabric B: In The Dark, Fat eight
Fabric C: Creepy Crawlers Cement, Fat eight
Fabric D: Seeds Olive, 2.5" square
Decorative trim (pipping or similar): 2 yds
-Medium weight, one-sided fusible interfacing or batting - 16 x 16” piece
-14"x14” pillow insert
-Cutting mat and rotary cuter
-Ruler
-Scissors
-Iron
-Needle and thread
-Sewing machine
-Pins, clips
-Fabric pencil or marker
CUTTING:
¼ seam allowances are included
Two (2) 2.5“ x 14.5” rectangles from Fabric A
Three (3) 2.5” squares from Fabric A
Eight (8) 2.75” squares from Fabric A
One (1) 2.5“ x 4.5” rectangle from Fabric A
Two (2) 2“ x 7.5” rectangles from Fabric A
Two (2) 3.5“ x 4.5” rectangles from Fabric A
Four (4) 2.75” x 4.75” rectangles from Fabric B
One (1) 2.5“ x 4.5” rectangle from Fabric B
Two (2) 2” squares from Fabric B
Four (4) 2.5” squares from Fabric C
Two (2) 2.5“ x 6.5” rectangles from Fabric C
One (1) 2.5“square from Fabric D
Pillow front: pumpkin block
Guided by the cutting and fabric requirements, make 4 Flying geese units.
• Prepare the 2 ¾” (2.75") squares in fabric A for the wings and 2 ¾” x 4 ¾” (2.75” x 4.75”) in fabric B for the geese body to make the FG units. Mark a diagonal line across the wrong side of all 2 ¾” squares. Place one square on the right corner of a corresponding rectangle, right sides together. Stitch across the corner on the line. Trim off corner, leaving a 1/4" seam. Press corner up.
Place another square on the left corner of the same rectangle, right sides together. Note that the second square will overlap the first one (that’s because you need to obtain the ¼” seam allowance at the top of
the triangle’s point). Stitch across the corner on the marked line. Trim off corner, leaving a 1/4" seam.
Press corner up. After all the FG units are sewn together, trim them to obtain 2 ½ ”x 4 ½ “ units.
Flippy corners on rectangles (row 2, 4 and 6):
• With wrong side up, mark all 2”corner squares in fabric B and 2.5”corner squares in fabric C in half
diagonally to determine the central - sew line.
• Paying close attention to the orientation of each corner square: place and align them on the
corresponding 2” x 7.5“ (row 4) and 2.5” x 14.5“ rectangles (for row 2 and 6) in fabric A and sew along the central diagonal line.
• Trim off corners, leaving a 1/4” seam allowance, press seams as desired, flipping the corner.
More about flying geese construction and floppy corners, you can learn HERE.
Adding the trim
With right side of the pillow front up, start pinning the trim all way around, starting from one corner and rounding it slightly on all corners. Sew the trimming in place, with the smallest seam allowance possible, finishing where you started, overlapping the trim’s edges.
Note: there are different weights, qualities and sizes of the trims, and depending on that, you may be able or not to slightly round the corners for the nice and professional finish. Thinner and softer trimmings are more suitable for shaping, while with thicker trimmings, you may be forced to cut the trimming separately for each of the pillow’s edges and overlap the edges on all corners.
Pillow back
The easiest way to make the pillow back is with simple envelope back.
Take the rectangles cut for the pillow back (2 Fat quarters), fold and press them on the longer side (22”) in half, wrong sides inside, so that you obtain two 18 x 11” pieces.
Pillow assemble
Overlap the back pieces, squaring them and place the pillow front with right side inside-facing the overlapped backs. Pin all layers together and cut the backs leftover edges to the size of the pillow front- 14.5" x 14”. Sew around all edges with ¼ seam allowance, rounding the corners slightly, to prevent protruding. Turn the pillow case right side out and place the pillow insert inside.






























 GRID
GRID
 DECADENCE
