. . . . . . . . . . . . . . . . . . . . . . . . . . . . . . . . . . . . . . . . . . . . . . . . . . . . . . . . . . . . . . . . . . . . . . . . . . . . . . . . . . . . . . . . . . . . . . . . . . . . . . . . . . . . . . . . . . . . . . . . . .

Thursday, 18 August 2011

Free swatch day @ Spoonflower!!

samples

August 18th is the Free Swatch Day at Spoonflower!
Spoonflower's Third Annual Free Swatch Day Starts Thursday, Aug. 18th, 2011
You can get a single free, custom fabric swatch for 24 hours between
noon EST on Thursday, August 18, and noon EST on Friday, August 19 with free shipping!!!

Read more about it HERE.

This is the great opportunity to get a piece of original design fabric for free and there are so many awesome designs to choose from:)
You can see some of mine available HERE


As the spoonflower prices are higher than when purchasing regular designer fabrics, I thought that it might be convenient thing to create the ready to cut and sew sets, where you get all in one: fabric, pattern and instructions.
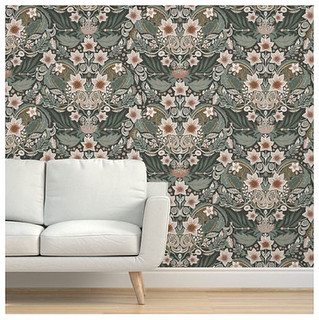
So, there is a section with sewing patterns-templates where you can find them. I will also post here all the step by step instructions with photos once I get the designs.Rabbit wallpaper bag template

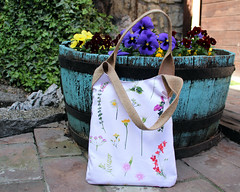
Remember, this bag? Now, you can buy this template that will allow you to create one bag. Spoonflower post worldwide and you can easily pay through Paypal or with some of the major credit cards (even Serbian;), so it is a great thing!!!
This pattern fits one yard of linen cotton canvas which is a medium weight fabric with lovely texture, suitable for the bag making. It don't have the instructions printed, as I barely managed to fit all the pieces for the bag, without almost any millimeter free(which I think is a neat way to use properly one yard of fabric for one normally sized hand bag without having almost any scrap pieces left;) Those 3 spots you can see in blue, purple and brown, these are left for fabric buttons, eventually;)
I tested this bag pattern and created a lovely birthday present for my sister, Jelena.

If you don't have the experience with sewing bags, you should wait for the all step by step blog post and as I took all the pics in process of making it, I will hopefully, be able to post it soon;)

Rabbit wallpaper bag

Also, thinking about babies and baby presents, I have created many sewing templates for baby bibs and can't wait to get them and make some bibs. I used the designs from my Playground collection , suitable for baby boys and girls. I can customize them, so once I test them, I will be able to offer some sort of- you design yourself bib set:)....thinking about the name of the baby etc...

bibs celebration

playground bibs

teddy bear bibs

And last, but not least, here is the softie family pattern. It is the fat quarter that will allow you creating 4 softie bears: Mama Bear, Papa Bear and baby boy and girl bear. Mine will arrive any day now (I hope), so that I can blog about it too;)
It is created for the next week, spoonflower's plushie contest.

Teddy Bear family

Have a wonderful weekend,
Katarina

Tuesday, 16 August 2011

Toothless boy and a frog

pablo with a frog

I know that these 2 things don't normally have anything in common, except my boy's recent top concerns.
Well, at this point, the first one was solved by going to the dentist and so we had the Tooth fairy coming for a visit during the last weekend (on August 13 for my memory). The second one regarding the frog is something that was related with his desired prize for the tooth being out(as the new one appeared already inside), as he is totally obsessed with animals, especially with lizards and frogs lately. I suppose that as much as some things may be absolutely yucky for me to understand, as far as those little animals aren't hurt, I'll be happy to obey his wishes and watch him enjoying his childhood. At the end, boys should be boys, right?:)

pablo tootless

lizards

frog

pablo frog

Wednesday, 10 August 2011

Paper dolls


When I was a little girl, my favorite game was playing with the paper dolls. I could play for hours, occasionally drawing my own designs and patterns.....
My mom smartly saved some of them and must say that I admire them much more than tons of other new modern dolls.
These retro ones are just the best, want you agree? They are from 1982.


Inspired with them, I made a few drawings that will be used as prints for the tee shirts I am working on. Hope you will like them too:)
xo,
Katarina

Sunday, 31 July 2011

Shabby flower tutorial

shabby fray flowers18

As promised, here is one easy step by step tutorial for the shabby fabric flower.
I created this fray flower 3 years ago, using remnants and scraps while making Marta's BD dress set, when I took all the pictures with aim to create the tutorial, but unfortunately some things never happen. At least not as firstly planned. But better late than never, right? And speaking about planned tutorials, I have also taken the pictures for the tutorial for these baby shoes and never had time to make the PDF pattern and write the tutorial. Well, some day:)

shabby fray flowers1

OK, back to this tutorial.....
If you don't like the fray, raw edges that gives this shabby look, you can perfectly use the 1.5" (4 cm) satin or acetate ribbon. Tulle looks great in this style too. Or even the knit jersey fabric strips to obtain great casual look(this is the great project to use with some old t-shirts that can easily be cut in strips)
You can create these flowers and use them as embellishments for garment pieces and/or accessory pieces, for clips, headbands, shoes, bags etc.
Sewing machine is very helpful, but optional, you can always use the basting stitch, sewing through the center of the fabric strip, leaving each of the thread ends long, pulling and gathering the fabric strip, trying to avoid gaping, creating the ruffled strip. And than you need to stitch it to the felt base, as following...

Needed supply:

1. 2 pieces of fabric cut in strips (around 1.15" x 48" (4 x 120 cm) for one flower, this length will depend on the ruffling) - the best for this project are the cheap polyester lining fabrics (fabrics that imitates silk like crepe, taffeta and satin that will allow nice fray, raw ends)
2. thread and needle
3. piece of felt for the base
4. clip or pin that will be attached to the flower base

Click on the smaller pictures to obtain the better view;)

shabby fray flowers2 To start, you'll need to ruffle the fabric strip. There are many ways to do it, but maybe the simplest with the sewing machine is to either gather with your fingers, ruffling it on your own or by setting the tension wheel on the machine so that one thread will be tighter than the other.


shabby fray flowers3 For the bases, you'll need to cut the felt(or other sturdy fabric), upon desired size of the flower. The peachy flowers shown in the first picture are made on the 3"(7 cm) diameter base. You can use any circular jar, plate or similar thing to draw the circle on the base.

shabby fray flowers4

Now you need to stitch the ruffled strip to the base, beginning from the edge of the circle going toward the center, creating some kind of the spiral.

shabby fray flowers5

Roll it up till reaching the center, cut the eventual remnants of the ruffled strip.

shabby fray flowers6

This is the finished flower, both sides.

shabby fray flowers9 shabby fray flowers10

Now you can attach the clip or whatever you prefer to the base and it's ready:)

shabby fray flowers13

shabby fray flowers11

shabby fray flowers15 shabby fray flowers14 shabby fray flowers17

Happy crafting:)
xo, Katarina

Wednesday, 27 July 2011

Salento vacation

San Pietro in Bevagna, summer 2011

I am still having some Blogger problems, but at least I realised that it is the browser problem related to Firefox, so thanks to Safari, I am able to be back to the blogland:)

San Pietro in Bevagna, Italy, 2011.

After just one week, it seems like we 've been there in some sort of other life, away from reality. Salento region of Puglia is one of the most beautiful regions of Italy, (the heel of the Italian boot) , just along the Ionian sea with beautiful sandy beaches and gorgeous architecture. Long sandy beaches are not among my favourite choices ( I am more pebbles and rocks person) regarding the sea cost, but it was fantastic for kids. The water was really so clean and looking in the crystal water under the sun, spoting the little fishes hunting under the water and the rainbowish reflections on the water, was sort of the inexplicable perfection.
San Pietro in Bevagna, Italy, 2011. Of course, not only that, but remembering those moments, provide some kind of serendipity and tranquility inside me. I was really enjoying all the colours (all the incredible shades of aquas and peaceful blues), smells, food, my kids happiness and some blissful moments of doing some hand embroidery and doodles. (yay for the friendship bracelets!!! you can even find the free tutorial here)

San Pietro in Bevagna, Italy, 2011.

San Pietro in Bevagna, Italy, 2011.

San Pietro in Bevagna, Italy, 2011.

San Pietro in Bevagna, Italy, 2011.

San Pietro in Bevagna, Italy, 2011.

San Pietro in Bevagna, Italy, 2011.

San Pietro in Bevagna, Italy, 2011.


San Pietro in Bevagna, Italy, 2011.

We visited some nearby cities, like Gallipoli, Manduria, San Marzano, Porto Cesareo and Porto Selvaggio (double gorgeous).

Gallipoli, Italy, 2011

Gallipoli, Italy, 2011

Porto Cesario, Italy, 2011

Porto Cesario granite, Italy, 2011

Porto Cesario, Italy, 2011


Bari, Italy, 2011.

Gallipoli, Italy, 2011

Gallipoli, Italy, 2011

We found so many shells and took them as souvenirs and reminder of another wonderful summer vacation.

San Pietro in Bevagna, Italy, 2011

Now, it's time to think about some work here;)
I am preparing many free tutorials, so hopefully I'll be back with the first one in a few days.
xo,
Katarina